
Safe Home Ear Wax Removal: Your Step-by-step Guide to Clear, Comfortable Ears
Dealing with that uncomfortable feeling of blocked ears or reduced hearing from wax buildup? You’re not alone—this common issue affects millions of people and can make everyday activities feel frustrating. The muffled sounds, pressure sensations, and constant urge to “dig out” the blockage can disrupt your daily comfort and peace of mind.
This comprehensive guide walks you through six proven, safe methods for removing ear wax at home, backed by medical research and presented in simple steps you can follow with confidence. We’ve researched the safest techniques and simplified the science so you can restore your hearing clarity without risking injury to your delicate ear canal.
Contents
- At a Glance: The Best Solutions
- The Science Made Simple: Why Ear Wax Buildup Happens
- 1. The Mineral Oil Softening Method
- 2. The Hydrogen Peroxide Dissolving Technique
- 3. The Warm Saline Solution Approach
- 4. The Bulb Syringe Irrigation Method
- 5. The Over-the-counter Ear Drop Solution
- 6. The Professional-grade Ear Irrigation Kit
- Common Mistakes to Avoid
- 5 Daily Habits to Support Healthy Ears
- Frequently Asked Questions
- Final Words
At a Glance: The Best Solutions
If you’re dealing with waxy ears or a feeling of fullness, you’re not alone-and you don’t need a trip to the clinic for every case of wax in ears. Several gentle, well-tested methods can help with at home ear wax removal without risking your hearing or ear health.
The right approach depends on your comfort level, what’s in your medicine cabinet, and whether you’ve softened the earwax first. Below is a quick-reference guide to the safest and most effective ways for how to safely remove ear wax at home.
| Method | Best For | Key Benefit |
|---|---|---|
| Mineral Oil Softening | Dry, hard earwax | Gentle, non-irritating, ideal for sensitive ears |
| Hydrogen Peroxide Dissolving | Loosening sticky or compacted wax | Bubbles help break up buildup without scrubbing |
| Warm Saline Solution | Mild buildup or post-swimming care | Natural, isotonic, and mimics your body’s fluids |
| Bulb Syringe Irrigation | After softening wax; moderate buildup | Controlled water flow for thorough cleaning out ear wax |
| Over-the-Counter Drops | Quick, ready-to-use solution | Formulated for safety and ease-no mixing needed |
| Professional-Grade Kit | Frequent wax ears or confident home users | More precise than DIY, with built-in safety controls |
Not all tools are created equal-skip anything sharp or rigid like an earpick or bobby pin. These can scratch your ear canal or push wax deeper, making the problem worse. Stick to methods that work with your ear’s natural shape and self-cleaning ability.
Remember: home earwax removal works best when you’re patient. Rushing or forcing the process can lead to irritation or injury. If you feel pain, dizziness, or sudden hearing changes, stop immediately and consult a healthcare provider.
The Science Made Simple: Why Ear Wax Buildup Happens
The Natural Purpose Of Ear Wax
Ear wax-medically known as cerumen-is your ear’s built-in cleaning and protection system. It traps dust, bacteria, and small particles before they can reach your eardrum, while also moisturizing the delicate skin of your ear canal to prevent dryness and itching. In most people, ear wax naturally migrates out of the ear during jaw movements like chewing or talking.
What Causes Excessive Buildup
Despite its helpful role, ear wax can accumulate faster than your body can clear it. Common culprits include narrow or oddly shaped ear canals, frequent use of earbuds or hearing aids (which block natural wax migration), and the habit of inserting objects like cotton swabs that push wax deeper. Aging can also reduce the elasticity of ear wax, making it drier and more likely to get stuck. This results in waxy ears that feel clogged or muffled.
Signs Your Ears Need Gentle Care
You might not realize you have excess wax until symptoms appear. Watch for a feeling of fullness in the ear, muffled hearing, ringing (tinnitus), occasional dizziness, or even a cough triggered by wax pressing on a nerve. If water gets trapped behind a wax plug after swimming or showering, it can also cause discomfort or a damp sensation that won’t go away. These are gentle signals that your ears could benefit from safe, at-home ear wax removal.

1. The Mineral Oil Softening Method
What You’ll Need
- Pure mineral oil (pharmacy-grade)
- Dropper or small syringe (without needle)
- Clean towel
- Cotton ball (optional, for post-application)
Step-by-step Process
Application Technique
- Warm the mineral oil by placing the bottle in a bowl of warm (not hot) water for 2–3 minutes-this helps prevent dizziness from cold liquid entering the ear.
- Tilt your head sideways so the affected ear faces up.
- Using the dropper, gently place 2–3 drops of oil into the ear canal. Don’t insert the dropper tip into the ear-just let the drops fall in.
Waiting Period
- Stay in position for 5–10 minutes to let the oil soak into the wax.
- You can place a cotton ball lightly in the outer ear to keep the oil from leaking out, but don’t press it in.
- Repeat this process once or twice daily for 3–5 days to gradually soften stubborn wax.
Gentle Removal
- After the wax has softened, you may notice it naturally working its way out during the day.
- If needed, gently wipe the outer ear with a damp cloth-but never probe inside the canal.
- For more thorough cleaning out ear wax, follow up with a warm saline flush (covered later) or let your body do the rest.
Also See: Quick Fixes: How to Get Rid Of Puffy Eyes and Under-eye Bags
2. The Hydrogen Peroxide Dissolving Technique
Materials Required
- 3% hydrogen peroxide (standard drugstore concentration)
- Distilled or boiled (then cooled) water
- Clean dropper
- Towel
- Bowl for mixing
Safe Application Steps
Proper Dilution
- Mix equal parts 3% hydrogen peroxide and distilled or cooled boiled water (e.g., 1 tablespoon each). Never use full-strength peroxide-it can irritate sensitive ear tissue.
- This diluted solution creates a gentle fizzing action that helps break apart compacted earwax without damaging your ear.
Application Method
- Lie on your side with the affected ear facing up.
- Using the dropper, place 5–10 drops of the diluted solution into the ear canal.
- You’ll likely hear a bubbling or fizzing sound-that’s the peroxide reacting with the wax, which is normal and safe.
- Stay still for 5 minutes to allow the solution to work.
Post-Treatment Care
- Slowly turn your head to the side to drain the liquid onto a towel.
- Gently wipe the outer ear with a soft cloth-never insert anything into the canal to “scoop out” loosened wax.
- Repeat once daily for up to 4 days if needed, but stop if you feel pain, increased fullness, or dizziness.
3. The Warm Saline Solution Approach
Creating Your Saline Solution
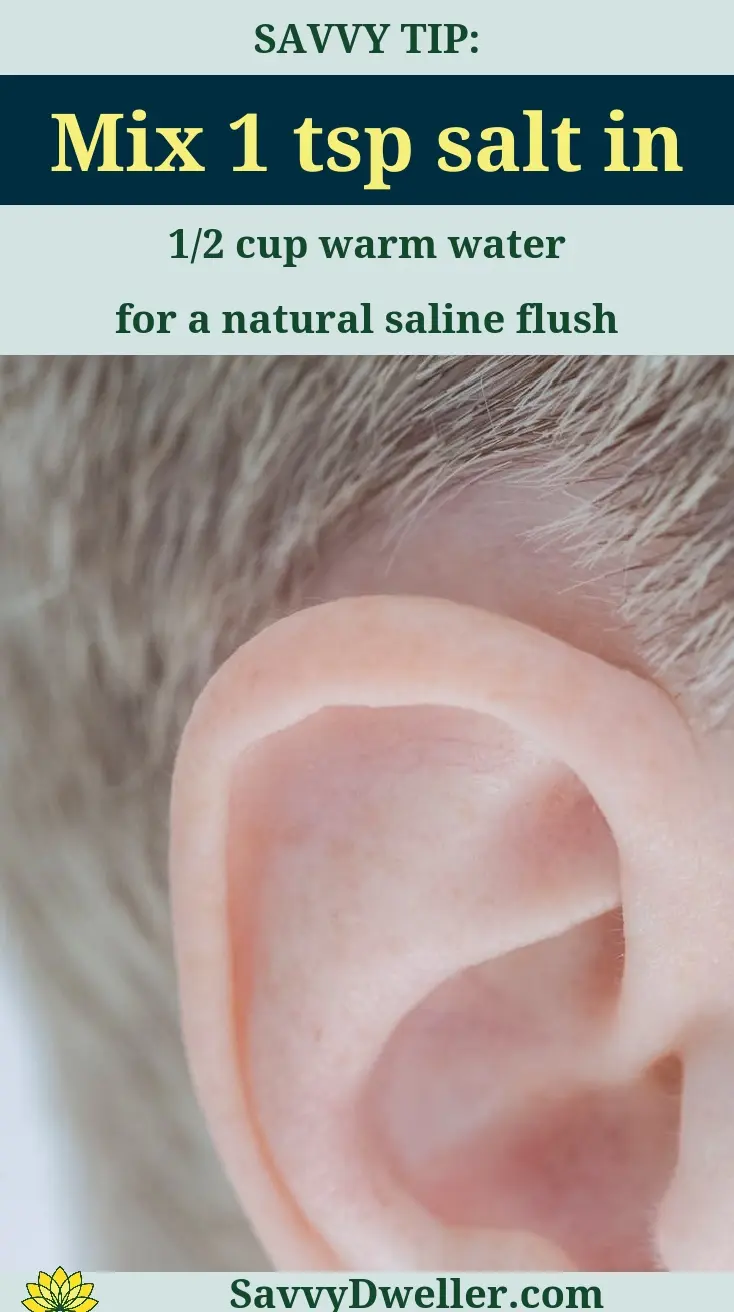
A simple saline rinse mimics your body’s natural fluids, making it a gentle choice for softening and loosening earwax. You can easily make it with just two ingredients you likely already have.
- 1 cup of distilled or previously boiled (and cooled) water
- ½ teaspoon of non-iodized salt
Mix until the salt fully dissolves. Ensure no granules remain-they could irritate the ear canal.
Application Process
Temperature Guidelines
The solution should feel comfortably warm-not hot-when tested on your wrist, similar to baby bottle temperature (around 98–100°F or 37°C). Water that’s too hot can burn the sensitive skin inside your ear, while cold water may cause dizziness.
Gentle Flushing Technique
- Tilt your head sideways over a sink or towel, with the affected ear facing up.
- Use a clean dropper or small squeeze bottle to place 3–5 drops of warm saline into the ear canal.
- Stay in position for 1–2 minutes to let the solution soften the wax.
- Gently tilt your head the opposite way to let the fluid-and loosened wax-drain out.
Repeat once daily for up to three days if needed. This method supports safe, gradual removing ear wax without aggressive tools.

4. The Bulb Syringe Irrigation Method
Equipment Needed
- Bulb syringe (available at most pharmacies)
- Distilled, sterile, or previously boiled and cooled water
- Towel or basin for drainage
Avoid using high-pressure irrigation devices or kitchen syringes-these aren’t designed for ear safety.
Preparation Steps
- Wash your hands thoroughly.
- Squeeze the bulb syringe to expel air, then draw in warm water (not hot).
- Hold the syringe upright and gently squeeze a small amount into the sink to remove air bubbles-this ensures smoother flow.
Safe Irrigation Process
Water Temperature Control
Use water that’s body-temperature warm (98–100°F). Cool or cold water can trigger vertigo, while hot water risks injury to the ear canal lining. Finding the right temperature not only soothes but may also help alleviate symptoms associated with dizziness. Incorporating natural remedies for vertigo can further enhance your comfort and wellbeing.
Pressure Guidelines
Squeeze the bulb syringe gently-just enough to create a soft stream. Never force water into the ear; if you feel pressure or pain, stop immediately. The goal is to rinse, not blast.
Positioning for Safety
- Lean over a sink with the affected ear facing down.
- Gently pull your outer ear up and back to straighten the canal.
- Place the syringe tip just inside the opening-do not insert it deeply.
- Allow water to flow in, then let it drain naturally by tilting your head.
This technique is effective for at home earwax removal when wax is softened first (e.g., with oil or saline). Never irrigate if you suspect a perforated eardrum.
5. The Over-the-counter Ear Drop Solution
Choosing Safe Products
Look for drops labeled for earwax removal that contain ingredients like carbamide peroxide, glycerin, or mineral oil. Avoid products with alcohol or harsh solvents if your ears are sensitive. Always check the label for “ear-safe” or “otic” use-never repurpose eye or nasal drops. Maintaining ear health is crucial, especially for those who experience the discomfort of tinnitus. Exploring natural remedies for tinnitus can provide relief from the annoying ringing in your ears.
Application Instructions
- Lie on your side with the affected ear facing up.
- Place the recommended number of drops (usually 3–5) into the ear canal, as directed on the package.
- Stay still for 3–5 minutes to let the solution penetrate the wax.
- Sit up and gently blot any excess with a tissue-do not insert anything into the ear.
Most products suggest using drops twice daily for 3–4 days. This method is ideal for waxy ears that feel clogged but aren’t causing pain.
What to Expect
You may hear bubbling or fizzing-that’s normal with peroxide-based formulas. Some temporary fullness or mild itching can occur as the wax softens. If you notice sharp pain, hearing loss, or discharge beyond softened wax, discontinue use and consult a healthcare provider. Over-the-counter drops offer a low-risk option for how to safely remove ear wax when used as directed.
6. The Professional-grade Ear Irrigation Kit
Kit Components
A professional-grade ear irrigation kit typically includes a few key parts designed for safe, controlled ear wax removal:
- Handheld irrigator or squeeze bottle with a soft, angled nozzle
- Measuring cup or mixing container for solution preparation
- Ear basin or towel-friendly collection tray
- Instruction manual with safety guidelines
- Sterile saline packets or solution concentrate (in some kits)
Setup Process
Before using your kit, assemble it in a clean, well-lit space. Wash your hands thoroughly and ensure all components are dry and sanitized. If your kit uses a pre-mixed solution, warm it to body temperature-about 98°F (37°C)-by placing the container in warm (not hot) water for a few minutes. Never use cold or hot liquid, as it can trigger dizziness or discomfort during irrigation.
Step-by-step Usage
- Sit upright with a towel draped over your shoulder and an ear basin held under the ear you’re treating.
- Gently pull your outer ear upward and backward to straighten the ear canal.
- Insert the nozzle just inside the ear opening-never push it deep into the canal.
- Slowly squeeze the irrigator to release a steady, low-pressure stream of warm saline or water.
- Allow the fluid (and softened wax) to drain naturally into the basin.
- Repeat on the other ear only if needed, using fresh solution each time.
Safety Features
Most quality kits include pressure-regulating nozzles that prevent forceful jets, reducing the risk of eardrum injury. Some models also have color-coded tips to avoid cross-contamination between ears. These built-in safeguards make professional-grade kits a safer choice than improvised tools for at home ear wax removal.
Cleaning and Maintenance
After each use, rinse all parts with warm water and mild soap. Allow components to air-dry completely before reassembling. Store the kit in a dry, cool place-never share it with others to avoid bacterial transfer. Replace nozzles every 3–6 months or if they show signs of wear.
Common Mistakes to Avoid
Never Use Cotton Swabs or Q-tips
Swabs push wax deeper into the canal, compacting it against the eardrum. This can lead to impaction, pain, or even temporary hearing loss. Despite their name, Q-tips are not designed for cleaning inside the ear.
Avoid Ear Candling
Ear candling-inserting a lit, hollow candle into the ear-has no scientific backing and poses serious risks like burns, wax blockage from candle residue, and eardrum perforation. The FDA and ENT specialists strongly advise against this practice for how to safely remove ear wax.
Don’t Use Excessive Force or Pressure
High-pressure irrigation, even with a bulb syringe, can rupture the eardrum. Always use a gentle, steady flow—like a light shower, not a jet spray. Occasionally, it’s important to ensure your shower has proper water pressure to avoid any sudden strong sprays.
Skip DIY Tools Like Bobby Pins
Metal objects like bobby pins, hairpins, or keys can scratch the delicate skin of the ear canal or puncture the eardrum. There’s no safe way to use sharp or rigid household items for cleaning ear wax.
When to Stop and Seek Professional Help
If home methods don’t improve symptoms after 2–3 attempts, or if you experience pain, stop immediately. Your ears may need a clinician’s care. It’s important to address any issues quickly and safely, especially when it comes to something as sensitive as a nosebleed. Knowing how to stop a nosebleed quickly and safely can help prevent further complications.
Warning Signs During Home Treatment
- Sudden sharp pain
- Dizziness or vertigo
- Ringing in the ears (tinnitus) that worsens
- Drainage of blood or pus
- Noticeable hearing loss after irrigation
Conditions That Require Medical Attention
Certain health factors make home earwax removal risky. Consult a healthcare provider before attempting any at-home method if you have: Earwigs can be an unwanted presence in home gardens as well. To get rid of earwigs in your home garden, consider simple methods like removing damp debris and using traps to keep them at bay.
- A history of eardrum perforation
- Ear tubes (tympanostomy tubes)
- Recurrent ear infections
- Diabetes or weakened immune system
- Known ear surgery or structural abnormalities
5 Daily Habits to Support Healthy Ears
Gentle External Cleaning Only
After showering, wipe the outer ear with a soft, dry cloth. Never insert anything into the ear canal-your ears are self-cleaning, and internal scrubbing disrupts their natural balance. If you experience a throbbing earache, there are several home remedies that can help provide relief. Simple treatments like warm compresses or over-the-counter pain relievers can alleviate discomfort effectively.
Keep Ears Dry After Water Exposure
Water trapped in the ear can mix with wax and cause buildup or infection. Tilt your head to drain excess water, or use a hair dryer on the lowest, coolest setting held at arm’s length. Dry ears help prevent waxy ears from becoming problematic. It’s also important to consider effective remedies for getting water out of your ear, as prolonged moisture can lead to swimmer’s ear. Simple techniques and home remedies can make a significant difference in alleviating discomfort and preventing potential infections.
Use Ear Protection in Dusty Environments
Dust, pollen, and debris can mix with earwax and accelerate blockage. Wear earmuffs or custom-fitted earplugs when working in high-dust settings like construction sites or workshops. This simple step reduces the need for frequent cleaning out ear wax.
Monitor for Changes in Hearing
If sounds seem muffled, voices are harder to understand, or you feel fullness in one or both ears, it could signal wax buildup. Early awareness helps you address wax ears before they worsen.
Schedule Regular Check-ups
Even if you don’t have symptoms, mention ear health during your annual physical. A quick visual exam can catch early signs of impaction. For those prone to wax in ears, a yearly ENT visit is a smart preventive measure.
Frequently Asked Questions
How Frequently Can I Safely Perform Ear Wax Removal at Home?
It’s best to only remove ear wax when you notice symptoms like muffled hearing or ear fullness, rather than on a strict schedule. Over-cleaning can irritate the ear canal and stimulate more wax production, so aim for no more than once every 4-6 weeks unless advised otherwise by a doctor. Always stop if you feel any pain or discomfort.
Can Certain Foods or Supplements Help Reduce Ear Wax Production?
There’s no strong evidence that specific foods directly reduce wax, but staying hydrated by drinking water can help keep wax soft and less likely to buildup. Anecdotally, some people find reducing dairy or high-fat foods helps, but focus on a balanced diet and proper ear care instead of relying on dietary changes alone.
What Should I Do if I Feel Dizziness or Discomfort During the Process?
If you experience dizziness, pain, or significant discomfort, stop immediately and do not continue with the removal method. Sit upright, rest, and allow the sensation to pass. Strong dizziness can have various causes, and knowing how to manage it at home can be incredibly helpful. Consider exploring the best home remedies for vertigo and dizziness to find relief.
Is It Normal for Ears to Feel Itchy After Removal, and How Should I Address It?
Mild itching can occur as the ear canal adjusts, but it should resolve quickly. Avoid scratching or inserting objects, which can cause injury. If itching continues, apply a drop of mineral oil to soothe the skin, but if it’s severe or accompanied by redness, consult a doctor to check for irritation or infection.
Are There Any Long-term Effects Of Regular Home Ear Wax Removal?
When done infrequently and correctly, home removal is generally safe with no long-term risks. However, overuse can lead to dry, irritated ear canals or impacted wax, so reserve these methods for symptomatic relief and combine them with professional check-ups to maintain ear health.
Final Words
Safe ear wax removal at home is absolutely achievable when you follow the right methods and prioritize gentle care. The six techniques we’ve outlined-from mineral oil softening to professional-grade irrigation kits-give you reliable options that work with your ear’s natural processes rather than against them. Remember, patience is your best friend here; rushing the process or using excessive force can cause more harm than good.
Your ears deserve the same thoughtful attention you give to other aspects of your home wellness routine. By incorporating the daily habits we’ve discussed and knowing when to stop for professional help, you’re setting yourself up for long-term ear health success. The warning signs we’ve covered aren’t meant to scare you-they’re your safety net for making smart decisions about when home care is enough and when it’s time to consult a healthcare provider.
Ready to give your ears the gentle care they deserve? Start with the method that feels most comfortable to you and follow our step-by-step guidance. For more trusted wellness solutions and home care tips that actually work, explore Savvy Dwelling where we continue researching and sharing the safest, most effective approaches to keeping you and your family healthy at home.

