How to Protect Your Hair From Heat Damage: 8 Expert-backed Methods That Actually Work
Have you noticed your hair feeling increasingly brittle, looking dull, or breaking more easily after regular styling with hot tools? You’re not alone in facing this frustrating battle against heat damage that can transform healthy, vibrant hair into stressed, weakened strands. The reality is that most of us rely on blow dryers, flat irons, and curling tools daily, yet we often lack the proper knowledge to shield our hair from their damaging effects.
This comprehensive guide will arm you with 8 scientifically-backed protection methods that actually work to preserve your hair’s health while still achieving the styles you love. We’ve researched the latest hair science and tested various approaches to bring you practical, actionable strategies that fit into your daily routine. You’ll learn exactly how to create an effective heat protection system that keeps your hair strong, shiny, and resilient.
Contents
- At a Glance: The Best Heat Protection Solutions
- The Science Made Simple: Why Heat Damage Happens
- 1. Apply Professional Heat Protectant Products
- 2. Master Temperature Control Settings
- 3. Choose Heat-friendly Styling Tools
- 4. Perfect Your Blow-drying Technique
- 5. Implement Strategic Heat-free Days
- 6. Nourish Hair With Pre-styling Treatments
- 7. Time Your Heat Exposure Correctly
- 8. Monitor and Address Early Damage Signs
- Common Mistakes That Worsen Heat Damage
- Frequently Asked Questions
- Final Words
At a Glance: The Best Heat Protection Solutions
| Protection Method | Best For | Heat Shield Level | Time Required |
|---|---|---|---|
| Professional Heat Protectant Spray | All hair types, daily styling | High (up to 450°F) | 2 minutes |
| Temperature Control Settings | Fine to medium hair | Medium (250-350°F) | Immediate |
| Pre-Styling Hair Treatments | Damaged or chemically treated hair | High + Repair | 10-20 minutes |
| Ceramic/Tourmaline Tools | Frequent heat users | Medium-High | One-time investment |
| Air-Drying Techniques | All hair types | Complete Protection | 2-4 hours |
The Science Made Simple: Why Heat Damage Happens
How Heat Breaks Down Hair Structure
Every strand of your hair is made mostly of keratin, a strong protein held together by bonds that give it shape and strength. When exposed to high heat-especially above 300°F-these bonds start to break down. Water inside the hair shaft evaporates rapidly, causing bubbles (known as “bubble hair”) that weaken the internal structure. Repeated exposure leads to irreversible changes in texture, elasticity, and shine.
Heat doesn’t just dry out your hair-it physically alters its molecular architecture.
The Role Of Hair Cuticles in Heat Protection
The cuticle is your hair’s outermost layer, composed of overlapping scales that act like roof shingles. In healthy hair, these lie flat and shield the inner cortex from damage. But high heat lifts and cracks these scales, exposing the fragile core to moisture loss and further breakage. Once the cuticle is compromised, your hair loses its natural defense against styling stress.
Why Different Hair Types React Differently to Heat
Fine or thin hair has fewer protective layers and a smaller diameter, making it more vulnerable to heat-even at lower temperatures. Coarse or thick hair can tolerate higher heat but often requires more passes with a tool, increasing cumulative exposure. Curly and coily textures have uneven cuticle patterns and natural dryness, which makes them prone to brittleness when heat is applied without proper moisture support. Chemically processed hair (relaxed, bleached, or colored) is already structurally weakened, so it needs gentler handling.
1. Apply Professional Heat Protectant Products
Essential Ingredients That Shield Hair Follicles
Silicones for Barrier Protection
Silicones like dimethicone and cyclomethicone form a lightweight, heat-resistant film over each strand. This barrier slows moisture loss and reflects some thermal energy, reducing direct cortex damage during styling.
Proteins for Structural Support
Hydrolyzed wheat, silk, or keratin proteins temporarily fill in gaps in the hair shaft, reinforcing weak spots. They don’t repair damage permanently but help maintain integrity during heat exposure, unlike collagen that benefits skin, hair, and joints internally.
Natural Oils for Moisture Retention
Argan, coconut, and jojoba oils penetrate slightly or coat the surface to lock in hydration. While they offer modest heat shielding (usually up to 300–350°F), their real strength lies in preventing post-styling dryness-a key part of protecting hair from heat damage.
How to Apply Heat Protectant for Maximum Coverage
- Start with damp (not soaking wet) or dry hair, depending on the product label.
- Shake the bottle well, then spray or dispense evenly from roots to ends.
- Use a wide-tooth comb or your fingers to distribute the product thoroughly-missing spots leave hair vulnerable.
- Wait 30–60 seconds for the formula to set before using any hot tool.
For best results in how to protect your hair from heat, never skip this step-even on “low” heat days.
DIY Heat Protection Recipes for Natural Solutions
- Coconut Oil + Aloe Vera Gel Mix: Combine 1 tbsp melted coconut oil with 2 tbsp aloe vera gel. Apply to damp hair before blow-drying for light protection up to 300°F.
- Argan Oil + Water Spritz: Mix 1 tsp argan oil with ¼ cup distilled water in a spray bottle. Shake before use and mist lightly over sections for a natural heat protectant hair alternative.
- Green Tea Rinse: Brew and cool green tea, then use as a final rinse before styling. Its antioxidants help reduce oxidative stress from heat tools.
Note: DIY options offer limited heat resistance compared to commercial formulas but can support moisture and shine during protecting your hair from heat routines.
Also See: The Amazing Benefits Of Castor Oil for Your Skin Hair and Eyelashes
2. Master Temperature Control Settings
Optimal Heat Settings by Hair Type
Fine Hair: 250–300°F
Fine strands scorch easily. Stay below 300°F to avoid melting the delicate cuticle.
Medium Hair: 300–350°F
This range gives enough heat for smooth styling without excessive stress-ideal for daily use.
Thick Hair: 350–400°F
Dense, coarse hair may need higher temps, but never exceed 400°F unless your tool and hair are both in top condition.
Chemically Treated Hair: 250–300°F
Bleached, relaxed, or color-treated hair is already compromised. Stick to the lowest effective temperature to minimize further heat damage on hair.
Understanding Your Heat Tool’s Temperature Range
Not all flat irons or curling wands display accurate temps. Many “450°F” tools actually fluctuate or overshoot. Use an infrared thermometer to check real surface heat if possible. Also, remember that repeated passes-even at “safe” temps-add up. One slow, smooth pass at 350°F is safer than three quick swipes at 300°F. Always match your setting to your hair’s current health, not just its texture. This is a core part of how to prevent heat damage on hair effectively.
3. Choose Heat-friendly Styling Tools
Ceramic Vs. Tourmaline Vs. Titanium: Material Breakdown
Not all hot tools are created equal-your choice of material directly affects how heat interacts with your strands.
- Ceramic emits even, gentle heat that’s ideal for fine or damaged hair. It reduces hot spots that can cause uneven damage.
- Tourmaline is a gemstone-infused ceramic that naturally generates negative ions, smoothing the cuticle and reducing frizz during styling.
- Titanium heats up quickly and maintains high temperatures steadily-best for thick, coarse, or resistant hair types that need intense, consistent heat.
If you’re aiming to protect hair from heat damage without sacrificing style, ceramic or tourmaline tools offer the safest balance for most users.
Features That Support Healthier Heat Styling
Even Heat Distribution Technology
Hot spots-areas of concentrated heat on your flat iron or curling wand-can scorch sections of hair in seconds. Tools with advanced heat distribution eliminate these spikes, ensuring every pass delivers consistent warmth. This minimizes localized damage and helps you achieve results faster with fewer passes.
Adjustable Temperature Controls
Fixed-temperature tools force all hair types to endure the same heat level-often too high for delicate strands. Adjustable settings let you customize the degree based on your hair’s needs, which is a cornerstone of preventing hair damage from heat. Always match the tool’s temp to your hair type (as outlined in Section 2) for optimal protection.
Negative Ion Generation
Negative ions break down water molecules faster during blow-drying and seal the hair cuticle during flat ironing. This reduces drying time and creates a smoother, shinier surface-key for protecting your hair from heat while enhancing manageability.
When to Replace Aging Heat Tools
Older tools lose calibration over time. If your flat iron takes longer to style, leaves inconsistent results, or no longer holds a steady temp, it’s likely working harder-and hotter-than needed. Replace heat tools every 2–3 years to maintain performance and minimize the risk of hidden heat spikes that contribute to what is heat damage on hair.
4. Perfect Your Blow-drying Technique
Pre-drying Steps That Aid Protection
Never apply high heat to soaking-wet hair. Gently blot excess water with a microfiber towel or cotton T-shirt first. This reduces drying time and limits prolonged heat exposure-two critical steps in how to keep hair from heat damage.
Sectioning Methods for Even Heat Distribution
- Divide damp hair into 4–6 sections using clips.
- Start at the nape of your neck and work upward.
- Use a round brush to lift roots while directing airflow downward along the shaft.
- Keep each section no wider than the brush barrel for consistent contact and faster drying.
This method ensures you don’t over-process the same area repeatedly-a common cause of heat damage.
Cool Shot Settings for Cuticle Sealing
Finish each section with a 5–10 second blast of cold air. The cool shot closes the hair cuticle, locking in smoothness and shine while reducing frizz. Using the cool shot is a simple yet powerful way to support heat protection for hair after styling.
Distance and Movement Techniques
Hold your dryer at least 6 inches from your scalp and keep it moving constantly. Hovering in one spot-even for a few seconds-can overheat and weaken strands. Use smooth, sweeping motions from roots to ends to distribute warmth evenly, a key tactic in how to protect your hair from heat.

5. Implement Strategic Heat-free Days
Air-drying Methods That Support Hair Health
Going heat-free isn’t just about skipping styling-it’s an active recovery strategy. These techniques enhance natural texture while giving your strands a break from thermal stress.
Plopping for Curly Hair
After applying curl cream, gently gather wet curls into a soft cotton T-shirt or microfiber towel, wrap it around your head, and let dry. This method absorbs excess moisture without disrupting curl formation-ideal for protecting curly hair from heat damage during recovery days.
Braiding Techniques for Waves
- Apply a lightweight mousse to damp hair.
- Divide into two loose braids (or more for tighter waves).
- Let air-dry completely before unraveling.
This creates defined, heat-free texture while minimizing friction and breakage.
Twist-Outs for Natural Texture
Section damp hair, apply a leave-in conditioner or curl-defining cream, twist each section, and let dry. Untwist once fully dry for bouncy, defined coils-no hot tools needed. This supports how to prevent heat damage on hair while celebrating your natural pattern.
Heat-free Styling Products That Work
Look for styling creams, mousses, or gels with humectants (like glycerin) and film-formers (like flaxseed or PVP). These hold style without crunch while maintaining moisture-key for heat protecting hair on off days. Avoid alcohol-heavy formulas that can dry out strands already recovering from thermal exposure.
6. Nourish Hair With Pre-styling Treatments
Deep Conditioning Masks for Heat Resilience
Weekly deep conditioning replenishes moisture lost during heat styling. Choose masks with ceramides, panthenol, or shea butter to fortify the hair’s lipid barrier-making it more resistant to thermal stress. Consistent moisture support is essential for how to protect hair from heat damage over time. One effective way to provide this extra moisture is by using the best DIY hair masks for dry, damaged hair.
Protein Treatments to Strengthen Hair Structure
Heat weakens keratin bonds. Protein treatments (with hydrolyzed wheat, silk, or keratin) temporarily fill in gaps in the hair shaft, restoring strength and elasticity. Use every 2–4 weeks-overuse can cause brittleness, so balance is key for protecting hair from heat damage without stiffness.
Oil Treatments for Moisture Barrier Support
Apply a lightweight oil (like argan, jojoba, or grapeseed) to mid-lengths and ends before heat styling. These oils form a breathable shield that slows moisture evaporation and smooths the cuticle. Oil pre-treatment supports heat protection hair strategies by buffering direct thermal contact. Additionally, incorporating oil treatments, like castor oil, can enhance not only your hair but also your skin and eyelashes. Castor oil is known for its amazing benefits, promoting hydration and growth for a range of beauty needs.
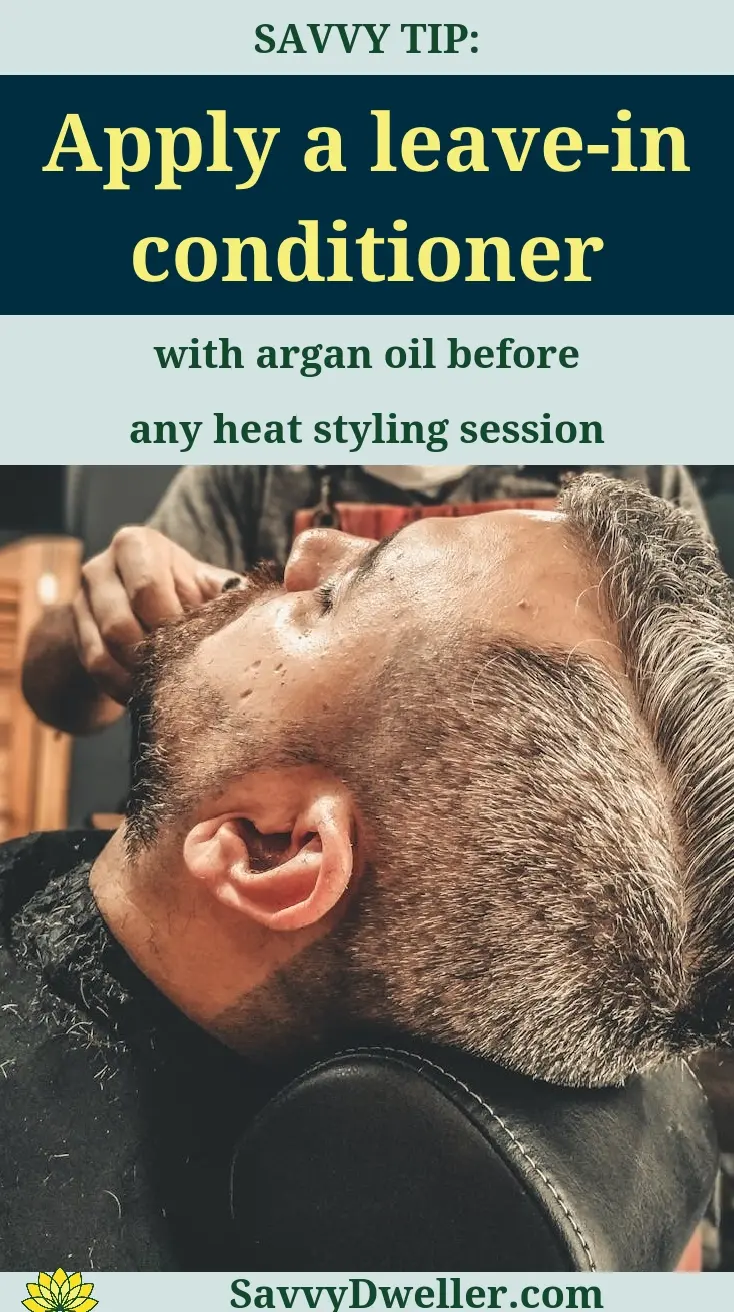
Leave-in Conditioners for Daily Protection
A good leave-in does double duty: it detangles and delivers light heat defense. Choose formulas with thermal-protective polymers or natural oils that remain on the hair between washes. Using a leave-in daily is one of the easiest ways to protect hair from heat during quick touch-ups or blowouts.
7. Time Your Heat Exposure Correctly
Optimal Styling Session Duration
Keep your total heat styling session under 20 minutes whenever possible. Longer exposure-even at safe temperatures-increases moisture loss and weakens hair fibers over time. Break your routine into focused segments: 5 minutes for blow-drying, 5–7 for straightening or curling, and 2–3 for touch-ups.
Frequency Guidelines for Different Hair Types
- Fine or thin hair: Limit heat styling to 1–2 times per week. This hair type heats quickly and loses moisture faster.
- Medium or normal hair: Safe for 2–3 sessions weekly if paired with heat protectant and proper temperature settings.
- Thick or coarse hair: Can tolerate 3–4 weekly sessions, but always use deep conditioning before and after.
- Chemically treated (colored, relaxed, bleached) hair: Max 1–2 times per week. Prioritize lower heat (250–300°F) and protein-reinforcing treatments.
Signs Your Hair Needs a Heat Break
If your strands feel rough, look frizzy without humidity, or tangle more than usual after styling, it’s a signal to pause heat use for at least 7–10 days. Constant need for heavier products to tame flyaways also indicates your hair is begging for a recovery period.
8. Monitor and Address Early Damage Signs
Visual Indicators Of Heat Stress
Dryness and Brittleness
Healthy hair bends before breaking. If strands snap when gently pulled or feel like straw, excessive heat has stripped natural oils and internal moisture-key signs of heat stress.
Split Ends and Breakage
Notice more short, uneven hairs around your hairline or mid-lengths? Heat weakens the keratin structure, making hair prone to splitting not just at the ends, but along the shaft.
Loss of Natural Shine
Dullness happens when high heat lifts the cuticle layer, scattering light instead of reflecting it. If your hair looks matte even after conditioning, heat damage may be the culprit.
Texture Changes
Sudden changes-like curls losing definition or straight hair becoming wiry-are red flags. Heat can permanently alter your hair’s natural pattern by degrading protein bonds that give it shape.
Touch Tests for Hair Health Assessment
- Take a single strand and gently stretch it. It should elongate slightly and return to shape. If it snaps or feels stiff, it’s compromised.
- Run fingers from root to tip. Healthy hair feels smooth. Snags or rough patches suggest cuticle damage from repeated heat exposure.
- After washing, let a section air-dry. If it feels dry or looks frizzy despite no styling, your hair’s moisture barrier is likely impaired.
When to Seek Professional Hair Care Support
If you notice persistent breakage, severe split ends beyond the tips, or scalp irritation after heat styling, consult a trichologist or experienced stylist. They can assess damage depth and recommend targeted in-salon treatments-like bond builders or protein reconstructions-that support recovery for protecting your hair from heat long-term.
Common Mistakes That Worsen Heat Damage
Styling Wet or Damp Hair With High Heat
Blow-drying is fine on damp hair, but using flat irons or curling wands on anything more than slightly damp causes steam to form inside the hair shaft-leading to bubbles, cracks, and irreversible breakage. Always ensure hair is 95% dry before direct-heat tools touch it.
Skipping Heat Protectant Application
Even at 300°F, unprotected hair suffers cumulative damage. Using heat protection on hair isn’t optional-it’s the first line of defense in how to protect hair from heat damage. Reapply if styling in multiple sessions or on second-day hair.
Using Maximum Temperature Settings Unnecessarily
Most styling tools max out at 450°F-an extreme only needed for thick, resistant hair during specific salon treatments. Daily use above 350°F accelerates cuticle erosion. Match your setting to your hair type, not your impatience.
Repeating Heat Styling on the Same Sections
Going over one strand 3–4 times to “get it right” multiplies thermal stress. Instead, clamp or wrap once with smooth, steady motion. If it’s not perfect, wait until your next styling day-don’t reprocess.
Neglecting Regular Trims and Treatments
Split ends travel up the hair shaft, worsening with every heat session. Schedule trims every 8–12 weeks to remove damaged ends. Pair this with weekly deep conditioning to maintain elasticity—critical for how to keep hair from heat damage from straighteners and other tools. To effectively combat split ends without sacrificing length, integrating specific hair care routines can be beneficial. This approach not only preserves your hair’s length but also ensures it stays healthy and vibrant.
Frequently Asked Questions
Can Heat Damage Be Reversed, and What Steps Should I Take?
While you can’t fully reverse severe heat damage that has altered the hair’s protein structure, you can significantly improve its appearance and health with dedicated care. Focus on intensive deep conditioning treatments at least once a week to replenish lost moisture, and incorporate protein-based masks every two weeks to help rebuild strength and elasticity. It’s also crucial to get regular trims every 6-8 weeks to remove split ends and prevent damage from traveling up the hair shaft, giving your hair a fresh start.
How Can I Protect My Colored or Chemically Treated Hair From Heat Damage Beyond Temperature Settings?
Colored hair is more porous and susceptible to damage, so extra precautions are essential. Always use a heat protectant spray that is specifically labeled for color-treated hair, as these often contain added UV filters and hydrating ingredients like ceramides to shield the hair cuticle. Furthermore, try to style your hair on the lowest effective heat setting and limit heat styling to 1-2 times per week. On other days, embrace heat-free styles like braids or buns to maintain your color and health.
What Role Does Diet Play in Protecting Hair From Heat Damage?
Your diet provides the building blocks for strong, resilient hair. Consuming foods rich in antioxidants (like vitamins A, C, and E) helps combat oxidative stress from heat styling, while adequate protein and omega-3 fatty acids support the hair’s keratin structure and natural oils. Incorporate sources like berries, spinach, salmon, and nuts into your meals, as these foods are also vital for promoting faster hair growth thanks to their rich vitamin content. But remember that a healthy diet supports internal health and works best alongside external protective measures like using heat protectants.
Are There Any Quick Fixes for Accidental Heat Burns on Hair?
If you accidentally burn a section of hair, act immediately to mitigate the damage. Gently apply a cool, damp cloth to the area for a few minutes to cool the hair shaft and soothe the scalp. Then, apply a generous amount of a leave-in conditioner or a reparative serum containing ingredients like panthenol or keratin to the burned strands to provide instant moisture and protection. Avoid applying any additional heat to that section and consider a professional trim if the hair is severely singed or brittle. Just like with minor burns on the skin, prompt and gentle care can minimize damage and support healing. For effective methods to treat minor burns, familiarizing yourself with home remedies can be incredibly helpful.
Final Words
Your hair’s health doesn’t have to be compromised for the sake of beautiful styling. The eight expert-backed methods we’ve covered provide a comprehensive approach to maintaining healthy hair while still achieving your desired look. From selecting the right heat protectant products to mastering temperature control and incorporating strategic heat-free days, these techniques work together to create a protective shield around your hair strands.
Remember that consistency matters more than perfection when it comes to heat protection. Start by implementing two or three of these methods and gradually build them into your routine. Your hair will begin showing signs of improved health within just a few weeks of consistent protective practices.
Ready to transform your hair care routine? Begin with the method that feels most achievable for your lifestyle today. For more wellness and home care solutions that actually work, check out Savvy Dwelling where we share research-backed tips to support your daily life. Your healthiest hair journey starts with your next styling session.
References You Might Like:
- How to Prevent Heat Damage when Straightening Your Hair
- How to Protect & Repair Heat Damaged Hair | Live Batiste™
- Tips for Avoiding Heat Damage | Toppik Blog – Toppik.com
- How To Prevent Heat-Damaged Hair: 8 Easy Tips – Odele Beauty
Also See: How to Reduce the Appearance Of Under-eye Wrinkles Naturally

