How to Clean Your Outdoor Grill Grates (the Easy Way)
Staring at those grimy, charred grill grates and feeling overwhelmed by the cleaning task ahead? You’re not alone in dreading this messy chore that seems to take forever and never quite gets the grates back to their original shine. The burnt-on grease, stubborn carbon buildup, and that nagging worry about food safety can make grilling feel more like work than the relaxing outdoor cooking experience it should be.
This guide will transform your grill grate cleaning from a dreaded chore into a quick, manageable task using methods that actually work. We’ve tested dozens of techniques to bring you the most effective, time-saving approaches that require common household items you probably already have. You’ll learn exactly which method works best for your specific grate type and situation, plus discover the simple habits that keep your grates cleaner longer.
Contents
- Quick Solutions Table
- The Science Made Simple: Why Grill Grates Get So Grimy
- 1. The Hot Grate Cleaning Method (While It’s Still Warm)
- 2. The Deep Soak Method for Heavily Soiled Grates
- 3. The Natural Kitchen Ingredient Methods
- 4. Cleaning by Grate Material Type
- 5. Tackling Rust Spots and Heavy Carbon Buildup
- 6. The Complete Cleaning and Re-seasoning Process
- Essential Tools and Supplies for Easy Grill Grate Cleaning
- 5 Habits to Keep Your Grill Grates From Getting Grimy Again
- Frequently Asked Questions
- Final Words
- Additional Resources for You:
Quick Solutions Table
Finding the best way to clean your grill grates starts with knowing your grate type. Different materials respond to different methods—what works for stainless steel might ruin porcelain coating. This table helps you match your grate to the right technique, so you spend less time scrubbing and more time grilling. Similarly, knowing how to clean stovetop grates for gas stoves is essential for maintaining their performance. Effective cleaning techniques ensure that your stovetop grates remain as efficient and durable as possible.
| Grate Material | Best Cleaning Method | Time Required | Difficulty Level |
|---|---|---|---|
| Cast Iron | Hot grate scraping + deep soak with mild soap + re-seasoning | 30–45 minutes | Moderate |
| Stainless Steel | Hot grate cleaning or baking soda/vinegar soak + soft-bristle brush | 15–30 minutes | Easy |
| Porcelain-Coated | Gentle hot wipe-down or Dawn soak (no abrasives!) + soft sponge | 20–30 minutes | Easy (but delicate) |
| Chrome-Plated | Hot grate method or mild vinegar solution + non-scratch pad | 15–25 minutes | Easy |
| Heavy Carbon Buildup (Any Type) | Deep soak + baking soda paste or steam cleaning | 1–2 hours (plus soaking time) | Hard |
When in doubt, always check your grill’s manual-some manufacturers void warranties if you use harsh chemicals or steel wool on coated grates.
This cheat sheet is your fast-track to knowing how to clean grill grates the right way, based on what you’re working with. Whether you’re doing a quick post-cook wipe or tackling months of baked-on residue, matching method to material keeps your grates safe, functional, and ready for your next cookout.
The Science Made Simple: Why Grill Grates Get So Grimy
The Chemistry Of Grease and Carbon Buildup
When fats and oils from meat drip onto hot grill grates, they don’t just sit there-they undergo thermal decomposition. This process breaks down the fats into sticky residues that bond tightly to the metal. Over time, repeated heating turns this gunk into carbonized layers that are tough to remove without the right approach.
Regular exposure to high heat essentially bakes on food particles, creating a crust that’s chemically bonded to your grate’s surface. That’s why simply wiping it down after grilling often isn’t enough.
How Different Grate Materials React to Heat and Food
Cast iron holds heat beautifully but is prone to rust if not seasoned properly. Stainless steel resists corrosion but can develop surface stains from charred food. Porcelain-coated grates offer a non-stick surface-but the coating chips easily under aggressive scrubbing, exposing the metal underneath to faster degradation.
Each material demands a tailored cleaning strategy to avoid damage while effectively lifting away grime. Using the wrong tool or cleaner can shorten your grate’s life and make future cleanings harder.
Why Regular Cleaning Actually Makes Future Cleaning Easier
Think of your grill grates like a non-stick pan: the cleaner they are today, the less gunk builds up tomorrow. When you clean right after cooking, residues haven’t had time to harden into carbonized crusts.
Consistent maintenance prevents the chemical bonds from fully forming-making your next clean-up faster, easier, and less abrasive.
1. The Hot Grate Cleaning Method (While It’s Still Warm)
What You’ll Need for This Method
- Stiff-bristled grill brush (brass or food-safe nylon)
- Grill scraper or wooden spatula (for cast iron or porcelain)
- Oven mitts or heat-resistant gloves
- Paper towels or a clean cotton cloth
Step-by-step Hot Cleaning Process
- Turn off the grill but leave the lid open so the grates stay warm (not scorching hot-around 250°F).
- Put on heat-resistant gloves to protect your hands.
- Scrub the grates firmly with your grill brush in one direction, lifting off loose debris.
- For stubborn bits, use a flat-edge scraper or folded aluminum foil (see Method #3) to dislodge without scratching.
- Wipe down with a damp cloth or paper towel to remove fine particles.
Safety Precautions When Working with Warm Grates
Never clean grates immediately after cooking-they can exceed 500°F and cause serious burns. Wait until the surface is warm to the touch but not hot enough to sizzle water. Always use gloves and avoid leaning directly over the grill to prevent inhaling smoke or fumes.
The 15-Minute Window That Makes All the Difference
Between 5 and 15 minutes after turning off the grill is the sweet spot: hot enough to loosen grease, cool enough to handle safely. Clean during this window, and you’ll spend seconds-not minutes-on maintenance.
Why This Method Works Best for Regular Maintenance
This technique is ideal for weekly grillers who want to keep their grates in top shape. It prevents buildup before it hardens, so you rarely need deep cleaning. If you use your grill often, this simple routine is the easiest way to clean grill grates without chemicals or soaking.
Also See: How to Remove Baby Food Stains From Bibs and Clothes
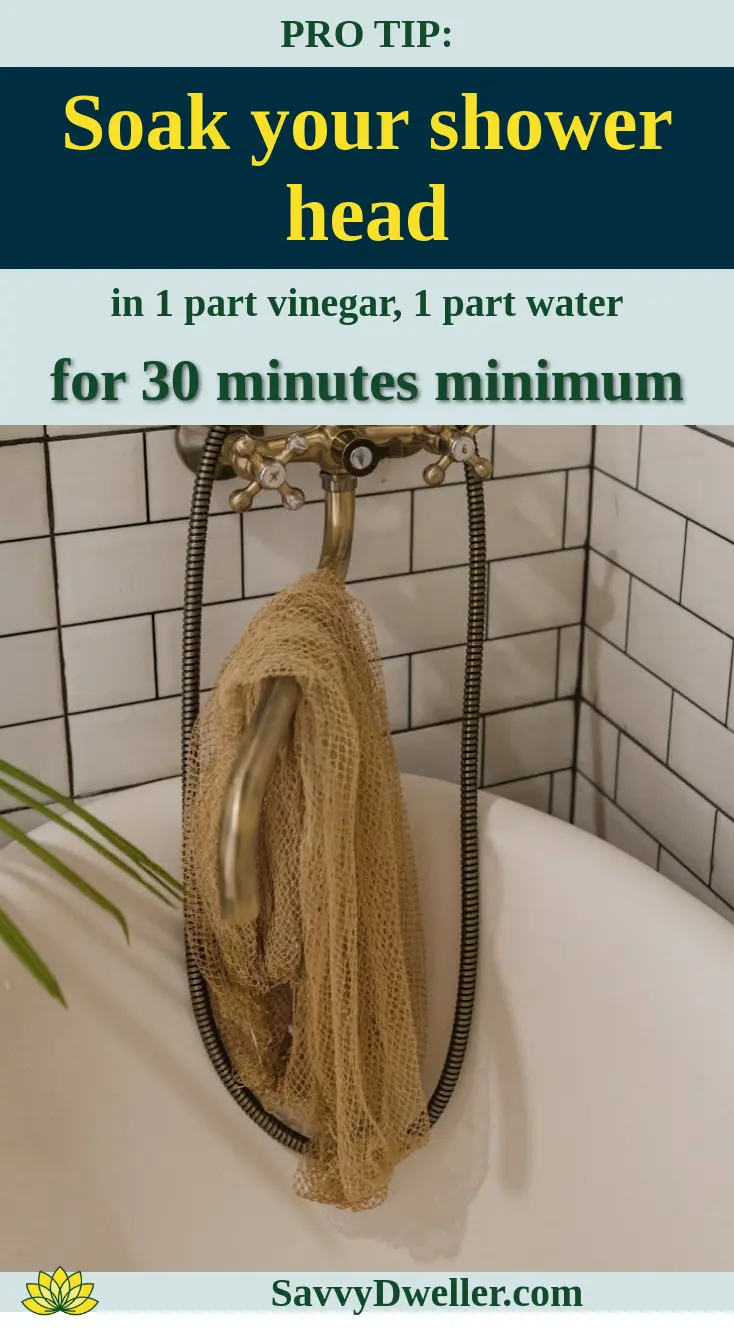
2. The Deep Soak Method for Heavily Soiled Grates
Gathering Your Supplies
- Large plastic bin, heavy-duty trash bag, or bathtub
- Dawn dish soap (or any degreasing dish liquid)
- Baking soda
- White vinegar (optional, for extra lift)
- Soft sponge or non-abrasive scrub pad
- Bucket of clean rinse water
- Towels for drying
Creating the Perfect Soaking Solution
Dawn Dish Soap and Hot Water Formula
Fill your container with the hottest tap water your hands can tolerate (around 120°F). Add ½ cup of Dawn dish soap per gallon of water. Dawn’s grease-cutting power breaks down oil molecules effectively, making it a go-to for how to clean outdoor grill grates without harsh chemicals. In addition to grill grates, this method can also be useful for tackling stubborn oven-baked grease. A thorough clean of your oven not only enhances its appearance but also improves cooking performance.
Baking Soda Paste for Stubborn Buildup
For thick, baked-on carbon spots, mix 3 parts baking soda with 1 part water to form a thick paste. Apply it directly to problem areas before soaking, or use it after soaking to scrub away remaining residue. Baking soda acts as a mild abrasive and neutralizes acidic char, lifting grime without scratching.
The Complete Soaking Process
- Remove grates from the grill and place them in your soaking container.
- Pour the hot, soapy solution over them until fully submerged.
- Let soak for the recommended time based on material (see below).
- After soaking, scrub gently with a soft sponge or nylon brush.
- Rinse thoroughly with clean water to remove all soap residue.
- Dry immediately to prevent rust or water spots.
How Long to Soak Different Types of Grates
| Grate Material | Recommended Soak Time |
|---|---|
| Stainless Steel | 30–60 minutes |
| Cast Iron | 15–30 minutes (never soak longer-rust risk!) |
| Porcelain-Coated | 30–45 minutes |
Where to Soak Large Grates Safely
If your grates won’t fit in a sink or tub, use a heavy-duty contractor trash bag laid inside a wheelbarrow or on a driveway. Fill the bag with your solution, submerge the grates, and tie the top loosely to prevent spills. This outdoor method keeps mess contained and makes it easy to dispose of dirty water responsibly.
3. The Natural Kitchen Ingredient Methods
The Onion Cleaning Trick
Why Onions Work on Grill Grates
Onions contain natural acids and enzymes that help break down stuck-on grease and carbon residue when heat activates them. This makes the humble onion a surprisingly effective tool for how to clean outdoor grill grates without harsh chemicals. The steam released as the onion hits the hot grate lifts grime while leaving behind a faintly antibacterial surface.
Step-by-Step Onion Method
- Cut a large onion in half (no need to peel it).
- Use tongs to hold one half firmly.
- Turn your grill on to medium-high heat and let the grates warm up for 5 minutes.
- Scrub the cut side of the onion back and forth across the hot grates.
- Let the steam and juice work for 2–3 minutes, then wipe with a damp cloth or paper towel.
Aluminum Foil Ball Technique
For a no-cost, zero-waste option, crumple a sheet of aluminum foil into a tight ball-about the size of a tennis ball. Use tongs to grip the foil and scrub the warm (not scalding) grates in firm circular motions. The abrasive surface lifts debris without scratching most grate types, making this a go-to for regular maintenance after learning how to clean a grill grate the gentle way.
Baking Soda and Vinegar Power Combo
Creating the Right Mixture
Combine ½ cup baking soda with just enough white vinegar to form a thick, spreadable paste—about 2–3 tablespoons. The fizzing reaction helps loosen baked-on gunk, offering a natural alternative for those wondering how do I clean a grill grate without commercial sprays. This simple combination is also a fantastic solution for oven cleaning. Discover how to effectively clean your oven using baking soda and vinegar for a sparkling finish.
Application and Scrubbing Process
- Turn off and cool your grill completely.
- Using a brush or gloved hand, apply the paste generously to all surfaces of the grates.
- Let it sit for 20–30 minutes (longer for heavy buildup).
- Scrub with a non-metal brush or sponge.
- Rinse thoroughly with water and dry completely before reassembling.

4. Cleaning by Grate Material Type
Cast Iron Grate Cleaning and Care
Special Considerations for Cast Iron
Cast iron grates are durable but prone to rust if mishandled. Never soak them in water or use soap aggressively-this strips their protective seasoning. For routine cleaning, use a stiff brush and hot water only. If you tackle carbon buildup, stick to methods like the onion trick or a dry scrub with coarse salt.
Re-seasoning After Cleaning
- Dry the grates completely over low heat on the grill (10–15 minutes).
- Using a paper towel, apply a thin layer of high-smoke-point oil (like canola or flaxseed).
- Heat the grill to 350°F–400°F for 1 hour with the oiled grates inside.
- Let cool inside the grill to lock in the new protective layer.
Stainless Steel Grate Methods
Avoiding Scratches and Damage
Stainless steel resists rust but shows scratches easily. Aggressive wire brushes can leave behind metal fragments that cause pitting, so opt for gentler tools when you clean your grill grates. Always scrub with the grain of the metal to preserve its finish.
Best Tools for Stainless Steel
- Nylon or brass-bristle grill brushes
- Non-abrasive sponges (like melamine foam)
- Baking soda paste for stuck-on spots
- Microfiber cloths for final polishing
Porcelain-coated Grate Handling
Gentle Cleaning to Preserve Coating
The porcelain enamel is tough but brittle-chips easily with impact or abrasive tools. For safe cleaning your grill routines, stick to soft brushes and avoid sudden temperature changes (like spraying cold water on hot grates). Even mild acids like vinegar should be diluted and rinsed quickly to prevent dulling the finish.
What Not to Use on Porcelain Grates
- Steel wool or metal scrapers
- Undiluted vinegar or lemon juice
- High-pressure sprayers
- Dish soap with degreasers (can degrade the coating over time)
5. Tackling Rust Spots and Heavy Carbon Buildup
Identifying When Grates Need Deep Treatment
If you notice flaky orange spots, persistent black crust that won’t budge with normal scrubbing, or uneven heating during cooking, it’s time for intensive care. These signs mean your usual how to clean outside grill grates routine isn’t enough-you need targeted rust or carbon removal.
Safe Rust Removal Methods
Wire Brush Alternatives That Won’t Damage
Instead of traditional wire brushes-known to shed bristles-try a brass-bristle brush for cast iron or a wooden scraper for porcelain. A crumpled copper scrub pad (used gently) also lifts rust without gouging softer metals. Always follow with oiling to prevent recurrence.
Sandpaper Techniques for Stubborn Spots
- Choose fine-grit sandpaper (180–220 grit).
- For cast iron, sand lightly in circular motions only on rusted areas.
- Wipe away dust with a dry cloth-never water.
- Immediately re-season the sanded spot to protect bare metal.
Carbon Buildup Solutions
Steam Cleaning Method
Boil water in a large pot, then carefully pour it over warm (not hot) grates placed in a roasting pan. Cover with a lid or foil and let steam for 30 minutes-the moisture softens carbon, making it easy to wipe away. This method works well for stainless and cast iron but avoid it on porcelain if the grates are cold, as thermal shock can crack the coating.
Commercial Grill Cleaners Worth Trying
- Simple Green Heavy-Duty Cleaner: Biodegradable and effective on carbon without fumes
- Weber Grill Grate Cleaner: Designed specifically for outdoor grills, safe on multiple surfaces
- Easy-Off Grill Cleaner (Foam version): Clings to vertical surfaces; rinse thoroughly
6. The Complete Cleaning and Re-seasoning Process
Final Rinse and Drying Techniques
After scrubbing off all the grease and grime, a thorough rinse is essential to remove any lingering cleaning agents or debris. But the job isn’t done until your grates are completely dry—moisture left behind can invite rust, especially on cast iron or bare steel. To keep your gas stovetop grates looking their best, it’s important to know the best way to clean them regularly. A mixture of baking soda and vinegar works wonders for cutting through tough grease and ensuring your grates are spotless.
Preventing Water Spots
Hard water leaves behind mineral deposits that look like cloudy spots, especially on stainless steel. To avoid this, rinse your grates with distilled or filtered water if your tap water is particularly hard. If that’s not feasible, a final wipe with a vinegar-dampened cloth can dissolve minerals before they dry.
Air Drying vs. Towel Drying
Air drying sounds gentle, but it takes time and lets moisture linger-bad news for rust-prone metals. Instead, use a clean, lint-free microfiber towel to dry your grates immediately after rinsing. For cast iron or carbon steel, this step is non-negotiable. Stainless steel can handle a bit more leeway, but towel drying still gives you the cleanest, streak-free finish.
Proper Re-seasoning Steps
Re-seasoning isn’t just for cast iron-it helps all bare-metal grates develop a non-stick, rust-resistant surface. Skipping this invites food to stick and accelerates corrosion.
Choosing the Right Oil
- High smoke point oils work best: canola, grapeseed, sunflower, or flaxseed oil.
- Avoid olive oil (low smoke point) or butter-they burn and leave gummy residue.
- Apply a paper-thin layer; too much oil creates sticky buildup instead of smooth seasoning.
Heat Application for Perfect Seasoning
- After drying, lightly coat the grates with your chosen oil using a brush or paper towel.
- Place the grates back in your grill or on a stovetop burner.
- Heat on medium-high for 15–20 minutes until the oil starts to smoke slightly and polymerizes into a slick, dark layer.
- Let cool completely before storing or using.
This process mimics the factory finish on new grates and is the secret behind effortless releases and easier future cleanings.
Storage Tips to Prevent Future Buildup
Store grates in a dry, covered area when not in use. If they must stay in the grill, always use a high-quality, breathable grill cover to block moisture while allowing airflow. For off-season storage, wrap clean, seasoned grates in butcher paper-not plastic-to avoid trapping humidity.
Essential Tools and Supplies for Easy Grill Grate Cleaning
Must-have Cleaning Tools
Picking the right tools makes cleaning faster, safer, and less damaging-especially for delicate surfaces like porcelain or brushed stainless steel.
Safest Grill Brush Options
Traditional wire brushes can shed bristles that stick to grates-and end up in your food. Safer alternatives include:
- Brass-bristle brushes (softer than steel, less likely to break off)
- Silicone grill scrapers (heat-resistant and non-scratch)
- Wooden scrapers (gentle on porcelain and cast iron)
Alternative Scraping Tools
- Balled-up aluminum foil (great for stainless steel)
- Nylon grill brushes (safe for non-stick or coated surfaces)
- Old cedar shingles (naturally abrasive, ideal for cast iron)
Best Cleaning Products for Different Situations
- Light residue: Warm water + dish soap (like Dawn)
- Grease buildup: Degreasing grill cleaners (look for plant-based formulas)
- Rust spots: White vinegar soak or naval jelly (for iron only)
- Porcelain care: Non-abrasive ceramic cleaners or baking soda paste
DIY Vs. Store-bought: What Really Works
DIY solutions like vinegar, baking soda, and dish soap are affordable and effective for routine maintenance and light grime. But for thick carbon crusts or baked-on grease on outdoor grill grates, store-bought degreasers often cut through faster with less elbow grease. A key part of maintaining a clean BBQ is ensuring that grill grates are free of burnt food, as this can affect the flavor of your meals. For the best way to clean grill grates heavily soiled, combine both: pre-soak in DIY solution, then finish with a targeted commercial cleaner.
5 Habits to Keep Your Grill Grates From Getting Grimy Again
Pre-cooking Preparation That Saves Hours Later
Oil your grates lightly before heating. This creates a barrier that reduces food sticking and makes post-cook cleanup far easier—especially when paired with clean oven racks. Use a high-smoke-point oil applied with tongs and a folded paper towel.
During-cooking Maintenance Techniques
If flare-ups cause sugary marinades or sauces to caramelize and burn, move food to a cooler zone. This prevents carbonized gunk from bonding to the grates mid-cook-making your final clean much simpler when you clean your grill grates later.
Post-cooking Quick Clean Routine
- While grates are still warm (not scalding hot), scrape off loose debris with a safe brush or scraper.
- Wipe with a damp cloth if needed-no soap necessary for light residue.
- Let cool, then apply a light oil coat if storing long-term.
This 2-minute habit prevents buildup and is the easiest way to clean grill grates between deep cleanings.
Proper Storage and Covering Methods
Never store damp grates. After cleaning and drying, place them in a dry garage or shed. If left in the grill, use a cover that vents moisture-fully waterproof tarps trap humidity and accelerate rust. Look for covers labeled “breathable” or “vented.”
Weekly Vs. Monthly Deep Cleaning Schedule
- Weekly (or after every 3–4 uses): Hot grate scrape + light wipe. Ideal for gas or frequent grillers.
- Monthly (or after heavy use): Full soak or deep clean using the methods for your grate material. Essential for charcoal grills or if you cook fatty meats often.
Sticking to this rhythm ensures you never face a nightmare-level cleaning session-and keeps your how to clean outdoor grill grates routine quick and painless.

Frequently Asked Questions
Can I Clean My Grill Grates in the Dishwasher?
It is generally not recommended to clean grill grates in a dishwasher, especially for cast iron or porcelain-coated types. Dishwasher detergents can be too harsh, potentially stripping seasoning from cast iron or damaging the coating on porcelain grates. Additionally, food particles and grease can clog your dishwasher drain and leave residues on other dishes.
For stainless steel grates, it might be possible, but check your grill manufacturer’s guidelines first. Hand washing with appropriate methods outlined in the article is safer and more effective for removing stubborn grime without risking damage to your grates or appliance. Similarly, dirty grout is another area that can benefit from a careful cleaning approach; the ultimate guide to cleaning dirty grout provides essential tips and techniques for restoring those tiles to their original shine.
What is the Safest Way to Dispose Of Used Cleaning Solutions From Deep Soaking?
After deep soaking grates, allow the solution to cool completely before disposal to avoid burns or container damage. For soapy water or baking soda mixtures, you can typically pour them down the drain with plenty of running water, as these are biodegradable and less harmful.
If you used a commercial grill cleaner or a vinegar-based solution, check the product label for disposal instructions. Avoid pouring large amounts of oily solutions down drains; instead, strain out solids and dispose of oils in a sealed container with household trash to prevent pipe clogs and environmental harm.
How Can I Prevent Animals From Being Attracted to My Clean Grill Grates During Storage?
To deter animals, ensure grates are thoroughly dried and free of food odors before storage. After cleaning, heat the grates briefly on the grill to evaporate any moisture and burn off residual smells that might attract pests like raccoons or insects.
Store grates in a secure, covered grill or a sealed container. Using a grill cover and placing a natural repellent like citrus peels or mothballs nearby (but not touching the grates) can further reduce interest from animals without contaminating your cooking surface.
Are There Any Health Concerns With Using Natural Cleaners Like Onions or Vinegar?
Natural cleaners are generally safe, but avoid inhaling strong vinegar fumes by working in a well-ventilated area, as they can irritate respiratory systems. Onions are non-toxic, but handle them carefully to prevent eye irritation during use.
While these methods are eco-friendly, rinse grates thoroughly after cleaning to remove any residue that could affect food taste or cause allergies. If you have sensitivities, wear gloves when handling onions or vinegar, and always test a small area first to ensure compatibility with your grate material.
Final Words
Clean grill grates transform your entire outdoor cooking experience, making every meal taste better while extending your grill’s lifespan. You now have proven methods that work for every grate material and cleaning challenge, from quick post-cooking maintenance to deep restoration of neglected grates.
The beauty of these techniques lies in their simplicity-most use ingredients you already have at home. Start with the hot grate method after your next grilling session, then establish the prevention habits that keep buildup from taking over. Your future self will thank you when cleanup becomes effortless instead of exhausting.
Ready to put these methods to work? Fire up your grill and give these techniques a try-you’ll be amazed at the difference clean grates make in your food’s flavor and your grilling confidence. For more practical home solutions and outdoor living tips, check out Savvy Dwelling where we share research-backed advice that actually works in real life.

