The Ultimate Guide to Cleaning Your Oven With Baking Soda and Vinegar
Staring at layers of baked-on grease and stubborn stains coating your oven interior? You’re not alone in feeling overwhelmed by what seems like an impossible cleaning task. That burnt cheese from last week’s pizza night and the mysterious black spots that appeared after your holiday roast can make even the most dedicated home cook want to avoid opening the oven door.
This comprehensive guide transforms oven cleaning from a dreaded chore into a manageable, chemical-free process using two simple household ingredients. We’ve tested and refined these methods to give you clear, step-by-step instructions that actually work. You’ll learn exactly how to harness the natural cleaning power of baking soda and vinegar to restore your oven to sparkling condition without harsh fumes or expensive commercial cleaners.
Contents
- At a Glance: The Best Solutions
- The Science Made Simple: Why This Natural Cleaning Method Works
- 1. Essential Materials and Tools You’ll Need
- 2. Preparing Your Oven for Deep Cleaning
- 3. The Basic Baking Soda Paste Method
- 4. The Vinegar Activation Process
- 5. Specialized Cleaning for Oven Racks
- 6. Glass Door Deep Cleaning Strategy
- 7. Advanced Techniques for Stubborn Stains
- 8. Final Cleanup and Maintenance
- Common Mistakes to Avoid
- Frequently Asked Questions
- Final Words
- Sources:
At a Glance: The Best Solutions
| Cleaning Challenge | Best Method | Time Required | Difficulty Level |
|---|---|---|---|
| Light grease buildup | Basic baking soda paste + vinegar spray | 30 minutes | Easy |
| Heavy baked-on grime | Overnight baking soda treatment | 12+ hours | Moderate |
| Oven racks | Bathtub soak method | 2-12 hours | Easy |
| Glass door cleaning | Gentle paste application | 20 minutes | Easy |
| Stubborn burnt stains | Thick paste + extended sitting time | 24 hours | Moderate |
The Science Made Simple: Why This Natural Cleaning Method Works
How Baking Soda Breaks Down Grease
Baking soda, or sodium bicarbonate, acts as a gentle alkaline abrasive that softens and lifts baked-on grease without scratching oven surfaces. Its mild alkalinity neutralizes acidic food residues and helps break down fatty deposits into easier-to-wipe-away components. Unlike harsh chemicals, it won’t corrode metal or damage enamel when used correctly.
The Power Of Vinegar’s Acidity
White vinegar’s acetic acid content gives it natural degreasing and deodorizing properties. When applied after baking soda, its acidity reacts to dissolve mineral deposits and loosen grime that baking soda has started to break apart. This makes it a perfect follow-up to the initial paste treatment in your baking soda and vinegar oven clean.
Why the Fizzing Reaction Matters
The fizz you see isn’t just for show-it’s a sign of an acid-base reaction doing real work. This effervescence helps lift debris from crevices and micro-scratches, giving you a deeper clean without scrubbing.
The Chemical Process Behind the Magic
When baking soda (a base) meets vinegar (an acid), they react to form water, carbon dioxide gas (the bubbles), and sodium acetate. This reaction creates a mild scrubbing action on a microscopic level-ideal for the nooks and crannies of your oven interior. The process is safe, non-toxic, and leaves no chemical residue behind.
Temperature and Time Factors
While the reaction works at room temperature, allowing the baking soda paste to sit for several hours-or overnight-maximizes its grease-cutting power. Heat isn’t needed for this method; in fact, applying the paste to a cool oven ensures safety and better adhesion. Patience is your secret weapon in the ultimate guide to cleaning your oven with baking soda and vinegar.
1. Essential Materials and Tools You’ll Need
Baking Soda Requirements
Arm yourself with plain, aluminum-free baking soda-not baking powder or scented varieties. You’ll need enough to make a thick paste that clings to vertical oven walls.
How Much to Use for Different Oven Sizes
- Small ovens (under 2 cu. ft.): ½ to ¾ cup
- Standard ovens (2–3.5 cu. ft.): 1 to 1½ cups
- Large or double ovens: 2+ cups
Quality Matters: Choosing the Right Baking Soda
Opt for a fresh, unopened box of pure sodium bicarbonate. Old or moisture-exposed baking soda loses reactivity. For the best results in your clean oven with baking soda and vinegar routine, use a food-grade or cleaning-specific brand with no added fragrances or fillers.
White Vinegar Specifications
You don’t need industrial-strength vinegar—standard 5% acetic acid white distilled vinegar is ideal for this job. This type of vinegar is also perfect for making all-purpose cleaning spray. Combining vinegar with water can create an effective and natural cleaning solution for various surfaces around the home.
Concentration Levels That Work Best
Stick to 5% acidity-the kind found in grocery stores. Higher concentrations (like 10% or 20%) are unnecessary, can damage surfaces, and increase fumes without improving cleaning power for home ovens.
Why White Vinegar Over Other Types
Apple cider, balsamic, or wine vinegars contain sugars, colors, and residues that can stain or leave behind odors. White vinegar is clear, odorless once dry, and leaves no trace-making it the only vinegar you should use to clean oven with soda and vinegar safely.
Additional Cleaning Supplies
- Microfiber cloths or soft sponges
- Non-abrasive scrub brush or old toothbrush for corners
- Spray bottle (16–32 oz)
- Small mixing bowl
- Rubber gloves
- Well-ventilated workspace
Microfiber Cloths and Scrubbing Tools
Use lint-free microfiber cloths for wiping-towel fibers can leave streaks or lint. A soft-bristled brush handles tight spots around seals and heating element brackets without scratching. Avoid steel wool or scouring pads; they can damage enamel and create rust-prone scratches.
Spray Bottles and Mixing Bowls
A dedicated spray bottle ensures even vinegar distribution. Mix your baking soda paste in a small bowl-glass or stainless steel works best to avoid odor absorption. Never mix large batches ahead of time; the paste dries out quickly.
Safety Equipment You Should Have
Wear rubber gloves to protect your skin from prolonged contact with baking soda (which can be drying) and vinegar (which may irritate sensitive skin). Open a window or turn on your range hood for ventilation-especially if your oven has strong food odors. This isn’t just about comfort; it’s part of responsible baking soda vinegar oven cleaning.
Also See: The Ultimate Guide to Getting Rid Of Fleas in Your Carpet
2. Preparing Your Oven for Deep Cleaning
Safety First: Cooling and Power Down
Never attempt to clean a warm or hot oven. Heat can cause burns, and warm surfaces prevent the baking soda paste from adhering properly.
How Long to Wait After Cooking
- Allow your oven to cool completely-usually 2–3 hours after use.
- Test by placing your hand near (not on) the interior. If you feel warmth, wait longer.
- For best adhesion and safety, clean only when the oven is at room temperature.
Disconnecting Self-Cleaning Features
If your oven has a self-cleaning mode, disable it before you begin. Accidental activation during manual cleaning could damage your paste application or create dangerous fumes when vinegar meets high heat. Check your manual or unplug the oven if you’re unsure how to disable it.
Removing Racks and Accessories
Take out everything that can be removed to treat surfaces thoroughly and avoid trapping paste in hidden areas.
What to Take Out vs. What to Leave In
- Remove: Racks, broiler pans, thermometers, pizza stones
- Leave in: Heating elements (do not remove-see next section)
- Check: Some ovens have removable bottom panels-consult your manual
Protecting Heating Elements
Never coat heating elements with baking soda paste. If paste gets on them, wipe it off gently with a damp cloth before it dries. Dried residue can burn off during the next use, creating smoke or odors. You can shield elements with foil during application if needed-but never cover them completely while the oven is in use.
Initial Debris Removal
Loose food bits and crumbs can mix with your paste and create a sludgy mess. Clear them out first.
Clearing Loose Crumbs and Food Particles
- Use a dry paper towel or soft brush to sweep large debris from the oven floor.
- For hard-to-reach corners, use a handheld vacuum with a brush attachment.
- Wipe down surfaces lightly with a dry microfiber cloth-don’t dampen yet.
This step ensures your baking soda paste sticks directly to grime, not to floating crumbs-making your how to clean oven with vinegar and baking soda process far more effective.
3. The Basic Baking Soda Paste Method
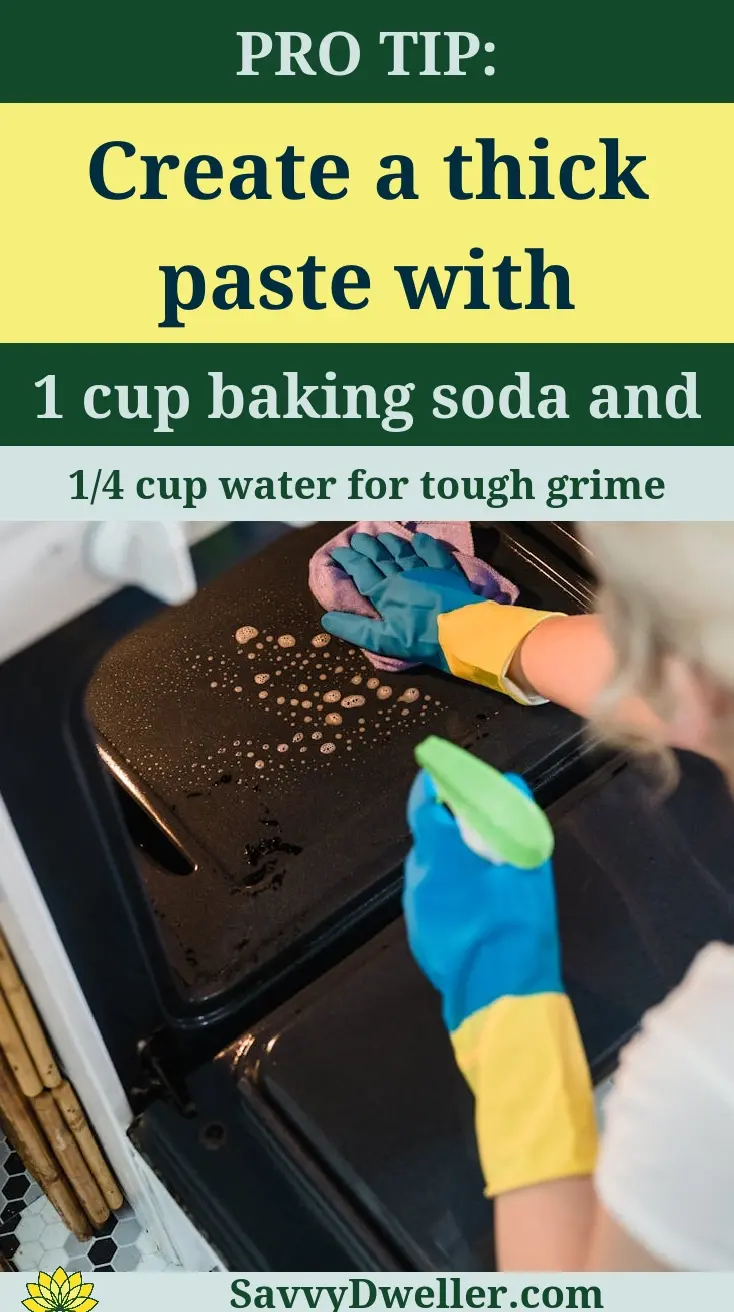
Creating the Perfect Paste Consistency
Water-to-Baking Soda Ratios
For the classic cleaning oven baking soda vinegar method, start with a 1:3 water-to-baking soda ratio-roughly 1 tablespoon of water for every 3 tablespoons of baking soda. This creates a paste that clings without dripping.
Achieving the Right Thickness
The ideal consistency resembles toothpaste: thick enough to stay put on vertical oven walls but soft enough to spread easily. If it’s too runny, add more baking soda. If it cracks when applied, mix in a few more drops of water.
Application Techniques
Covering All Interior Surfaces
Use a sponge or rubber spatula to coat every interior surface-back wall, sides, floor, and ceiling-with your paste. Focus on greasy or charred spots, but avoid electrical components and heating elements.
Areas to Avoid for Safety
Never apply baking soda paste to exposed heating coils, thermostat sensors, or oven light housings. These components can be damaged by moisture or residue buildup, even from gentle cleaners like baking soda.
How Thick to Apply the Paste
Aim for a layer about ¼ inch thick over stubborn grime. For light buildup, a smooth, thin coating is sufficient. Thick doesn’t always mean better-over-application makes rinsing harder later.
Timing for Maximum Effectiveness
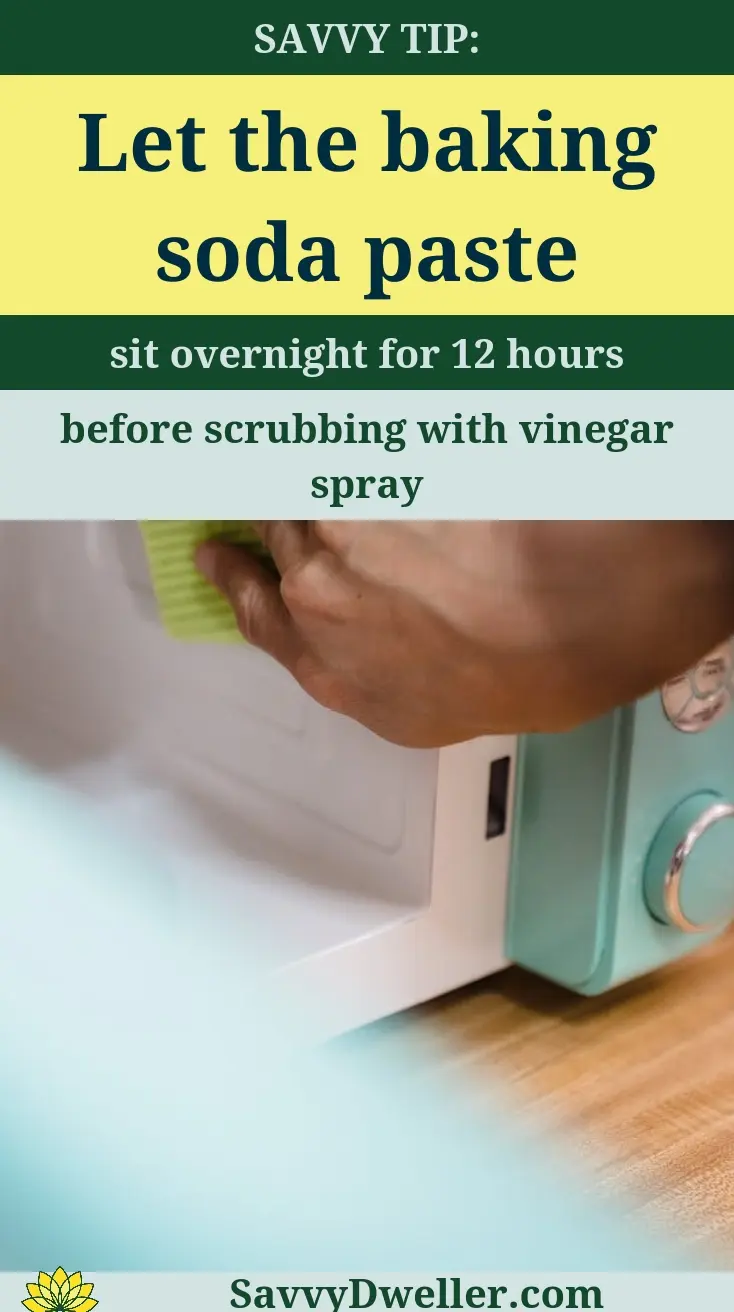
Minimum Sitting Time Requirements
Let the paste sit for at least 12 hours for moderate grime. That’s the sweet spot for the baking soda to break down grease molecules through gentle abrasion and alkaline action.
Benefits of Overnight Treatment
An overnight soak (8–12 hours) transforms tough, baked-on residue into a soft, wipe-away layer. This extended dwell time allows the paste to fully penetrate carbonized food particles-making your final cleanup far less labor-intensive.
4. The Vinegar Activation Process
Proper Vinegar Application
Using a Spray Bottle vs. Direct Application
A spray bottle gives you precision and even coverage without oversaturating. Direct pouring risks pooling, which can drip onto heating elements or create slippery surfaces. Always mist-don’t flood.
Amount of Vinegar Needed
You’ll need about ½ to 1 cup of white vinegar, depending on oven size. Fill a standard 16-oz spray bottle halfway-enough for one or two full passes over the entire interior.
Understanding the Fizzing Reaction
What Normal Fizzing Looks Like
When vinegar hits the baking soda paste, expect a gentle, immediate fizz—like a quiet soda bubbling. This effervescence signals the acid-base reaction that lifts grime and neutralizes odors, making it a perfect solution for smelly drains.
Safety Considerations During Reaction
Work in a well-ventilated kitchen. Though non-toxic, the reaction can release mild fumes. Keep your face back slightly when spraying to avoid any minor splatter from the fizz.
Timing the Chemical Process
How Long to Let It Work
After spraying, wait 10–15 minutes. This gives the reaction time to complete and loosen the paste-infused grime. Don’t rush-patience here means less scrubbing later.
When to Begin Wiping Down
- Start with a damp microfiber cloth or non-scratch sponge.
- Wipe in sections, rinsing your cloth frequently in warm water.
- For stuck-on bits, use a plastic scraper at a low angle-never metal.
5. Specialized Cleaning for Oven Racks
The Bathtub Soaking Method
Setting Up Your Soaking Solution
Place oven racks in your bathtub and cover them with hot water. Add ½ cup baking soda and ½ cup white vinegar. The mixture will fizz briefly, then settle into a potent soaking solution.
Protecting Your Bathtub Surface
Line the tub with an old towel or rubber mat. This prevents scratches from the rack’s weight and protects enamel or acrylic finishes from abrasion during soaking and scrubbing.
Alternative Soaking Solutions
Using Large Basins or Outdoor Options
No bathtub? Use a heavy-duty storage bin, kiddie pool, or even a clean wheelbarrow outdoors. Ensure the container is deep enough to fully submerge the racks.
Garbage Bag Method for Stubborn Cases
For heavily crusted racks, slide them into a large contractor-grade garbage bag. Add 1 cup baking soda, 1 cup vinegar, and 2 cups hot water. Seal tightly and let sit overnight. The confined space intensifies the cleaning action. Baking soda is a versatile cleaner that can tackle various messes around the house, making it a go-to solution for many cleaning challenges.
Scrubbing and Finishing Techniques
Best Tools for Rack Cleaning
- Nylon-bristle brush (stiff but non-metal)
- Old toothbrush for tight corners
- Plastic mesh scrubber for textured surfaces
Drying and Reinstallation
Rinse racks thoroughly until water runs clear. Dry completely with a clean towel or air-dry in the sun to prevent rust. Only reinstall once 100% dry—moisture inside your oven can cause smoke or odors when heated. For best results, consider ways to clean oven racks without the hassle of scrubbing for an even easier maintenance process.
6. Glass Door Deep Cleaning Strategy
Gentle Application for Glass Surfaces
Modified Paste Consistency for Glass
For the oven door, thin your baking soda paste slightly-use a 1:2 water-to-baking soda ratio. This lighter mix cleans effectively without leaving gritty residue that could scratch glass during wiping, especially when used on baked-on grease in ovens.
Avoiding Damage to Door Seals
Keep paste away from rubber or silicone gaskets around the glass. Baking soda can dry out seals over time. Apply paste only to the glass itself, using a small brush or cloth to stay within boundaries.
Tackling Between-glass Cleaning
When Professional Help is Needed
If grime is trapped between double- or triple-pane oven glass, DIY methods won’t reach it. This usually requires disassembly by a technician-don’t attempt to pry open sealed units yourself.
DIY Methods for Accessible Areas
Some oven doors have removable inner glass panels. Consult your manual. If yours does, carefully take it out, soak it in baking soda solution, and clean both sides before reassembling. Regularly cleaning your oven door glass enhances visibility while cooking. A spotless glass door can make a significant difference in monitoring your meals without having to open the oven.
Streak-free Finishing Techniques
Final Vinegar Rinse Method
- Mix equal parts white vinegar and water in a spray bottle.
- Spray lightly onto the cleaned glass surface.
- Wipe immediately with a dry, lint-free microfiber cloth using straight vertical strokes.
Polishing for Crystal Clear Results
For a gleaming finish, buff the glass with a dry microfiber cloth using small circular motions. This removes any lingering haze and ensures your oven door looks spotless from every angle—completing your ultimate guide to cleaning your oven with baking soda and vinegar with true clarity. Achieving a streak-free shine goes beyond just buffing; it’s essential to use the right cleaner. A simple DIY glass cleaner recipe can provide that perfect finish without any annoying streaks.
7. Advanced Techniques for Stubborn Stains
Heavy-duty Paste Formulations
When everyday grime turns into rock-hard carbonized buildup, your standard baking soda paste may need a boost. These enhanced formulations tackle the toughest residues without harsh chemicals.
Adding Salt for Extra Abrasion
Fine sea salt or kosher salt adds gentle grit that helps break down charred-on food without scratching most oven surfaces.
- Mix ½ cup baking soda with 2 tablespoons of fine salt.
- Add just enough water to form a thick, spreadable paste-about 2–3 tablespoons.
- Apply directly to burnt areas using a soft sponge or gloved fingers.
- Let sit for at least 12 hours before vinegar activation.
Essential Oil Additions for Pleasant Scent
While not a cleaning agent, a few drops of citrus or tea tree essential oil can mask lingering odors and make the process more enjoyable-especially during long treatments.
- Use only 5–8 drops per ½ cup of baking soda paste.
- Opt for pure, food-grade oils to avoid residue or fumes.
- Lemon, orange, or eucalyptus oils pair well with vinegar’s sharpness.
Extended Treatment Protocols
For ovens neglected over months or years, patience is your most powerful tool. These protocols maximize dwell time for deep penetration.
48-Hour Deep Treatment Method
- After removing loose debris and racks, apply a thick layer of standard baking soda paste to all stained surfaces.
- Cover the oven interior with plastic wrap or a damp towel to prevent drying (avoiding heating elements).
- Leave undisturbed for 48 hours in a cool, dry kitchen.
- After two days, mist lightly with vinegar and let it fizz for 15 minutes.
- Wipe away with microfiber cloths and warm water.
Reapplication Strategies
If stains persist after the first round, don’t scrub harder-reapply smarter.
- Rinse the area lightly with water to remove old paste residue.
- Apply a fresh, slightly thicker layer of baking soda paste.
- Increase sitting time by 6–12 hours beyond the initial treatment.
- For layered grime, repeat the full cycle up to three times.
Targeted Spot Treatment
Not every stain needs a full-oven overhaul. Precision cleaning saves time and effort.
Dealing with Burnt Sugar and Cheese
Burnt dairy and caramelized sugar create sticky, hardened films that resist standard methods.
- Dampen the spot with warm water for 2–3 minutes to soften the surface.
- Apply a paste made with baking soda and a few drops of dish soap (not vinegar yet).
- Cover with a warm, wet cloth for 30 minutes to create a steam effect.
- Scrape gently with a plastic spatula, then follow with vinegar activation.
Removing Smoke Stains and Odors
Smoke residue often clings to the oven ceiling and door, leaving yellow-brown streaks and stale smells.
- After the main cleaning, place a small bowl of vinegar on the oven floor overnight with the door ajar.
- For stains, use a baking soda paste mixed with 1 tablespoon hydrogen peroxide (3%)-apply only to cool, non-heating surfaces.
- Avoid using peroxide on aluminum or uncoated metal racks.
8. Final Cleanup and Maintenance
Thorough Rinsing Procedures
Residual baking soda or vinegar left behind can cause odors, smoke, or interfere with cooking-a meticulous rinse is non-negotiable.
Ensuring No Residue Remains
Even invisible traces can affect your next bake. Use the “white cloth test”: wipe a dry, clean microfiber cloth over all surfaces. If it comes away gray or gritty, rinse again.
Multiple Wipe-Down Technique
- First wipe: Use a damp cloth soaked in warm water to remove bulk residue.
- Second wipe: Rinse the cloth and add a splash of white vinegar to cut any film.
- Third wipe: Use a clean, water-only cloth to neutralize vinegar traces.
- Final check: Buff with a dry microfiber cloth for a streak-free finish.
Drying and Ventilation
Moisture trapped in corners or seals can lead to mildew or lingering smells.
Proper Air Circulation Methods
- Leave the oven door propped open for 2–4 hours after cleaning.
- Place a small fan nearby to speed up drying, especially in humid climates.
- Wipe door seals and crevices with a dry cotton swab to remove hidden moisture.
When It’s Safe to Use Your Oven Again
Wait at least 4 hours after the final rinse-and ensure the interior is completely dry-before turning on your oven. Running it empty at 300°F (150°C) for 15 minutes can help evaporate any remaining traces and test for odors.
Quality Check and Touch-ups
A final inspection prevents surprise smoke or smells during your next use.
Inspecting for Missed Spots
- Use a flashlight to check corners, around knobs, and under the bottom panel.
- Look for chalky white patches (baking soda residue) or sticky film (grease or vinegar buildup).
Final Polishing Steps
- Dampen a corner of a microfiber cloth with distilled water.
- Gently buff any dull or streaked areas on the glass door.
- For stainless steel exteriors, wipe with a vinegar-water mix (1:1) followed by a dry polish.

Common Mistakes to Avoid
Mixing Baking Soda and Vinegar Too Early
The fizzing reaction happens instantly-apply baking soda paste first, let it dwell, then spray vinegar just before wiping. Premixing wastes the cleaning power.
Using Too Much Vinegar at Once
Flooding the oven with vinegar can leave acidic residue and overpowering fumes. A light, even mist from a spray bottle is all you need.
Not Allowing Adequate Sitting Time
Baking soda needs hours-not minutes-to penetrate baked-on grime. For heavy buildup, anything less than 12 hours significantly reduces effectiveness.
Forgetting to Protect Heating Elements
Wrap exposed coils or bottom heating elements in foil before applying paste. Baking soda isn’t conductive, but moisture near electrical parts risks damage.
Attempting to Clean a Hot Oven
Heat opens pores in grime, making it stick tighter. Always wait until the oven is completely cool-usually 2–3 hours after last use.
Using Abrasive Tools on Glass Surfaces
Steel wool or stiff brushes can permanently scratch oven glass. Stick to soft sponges, microfiber cloths, or plastic scrapers. Protecting the surface of your stovetop is essential, as scratches can affect its appearance and functionality. If scratches do occur, there are effective methods to erase scratches from a glass stovetop and restore its sleek look.
Inadequate Ventilation During Cleaning
Vinegar fumes can irritate eyes and throat. Open windows or run an exhaust fan during and after the vinegar step.
Rushing the Final Rinse Process
Skipping a thorough rinse leaves behind baking soda crystals that smoke and smell when heated. Take the extra 10 minutes to wipe every surface three times.
Frequently Asked Questions
How Often Should I Deep Clean My Oven Using Baking Soda and Vinegar?
For average use, aim to clean your oven every 3 to 6 months to prevent grime from becoming unmanageable. If you frequently cook greasy or sugary foods, consider a quick maintenance clean every 1-2 months to tackle spills immediately, reducing the need for heavy-duty sessions.
Are There Any Health Considerations for Individuals With Allergies or Asthma?
While natural, the vinegar smell can irritate respiratory issues; always ensure excellent ventilation by opening windows and using fans. Wear a mask if sensitive, and avoid mixing baking soda and vinegar in enclosed spaces to minimize fume inhalation. The ingredients are non-toxic, but test on a small area first if you have skin allergies.
What is the Best Way to Dispose Of the Cleaning Waste After the Process?
After wiping, scrape the paste into a trash bag instead of washing it down the drain, as baking soda can clog pipes. For liquid residue, dilute vinegar with water before pouring it sink, but avoid large quantities. This method is eco-friendly, but dispose of solids with household waste.
Can I Extend This Cleaning Method to the Oven’s Exterior Surfaces?
Yes, but use a milder paste and avoid abrasive scrubbing on painted or control panels. For stainless steel exteriors, apply a thin paste, wipe gently, and rinse with vinegar water for shine. Always check manufacturer guidelines to prevent damage to sensitive finishes.
How Does the Cost Of This Natural Method Compare to Store-bought Cleaners?
This approach is significantly cheaper, costing pennies per use versus $5-$15 for commercial cleaners. Baking soda and vinegar are multi-purpose, so you’ll save money on specialized products. Plus, you avoid harsh chemicals, making it a budget-friendly and health-conscious choice.
Final Words
Your oven doesn’t have to stay grimy and stained – this natural cleaning method really works. The baking soda and vinegar technique we’ve outlined transforms even the most stubborn burnt-on messes into sparkling clean surfaces without harsh chemicals. You now have all the tools and knowledge to tackle everything from light grease buildup to heavy-duty grime using ingredients you probably already have in your kitchen.
Give this method a try this weekend and see the incredible results for yourself. Start with the basic paste technique if you’re new to natural cleaning, or jump straight to the overnight treatment for heavily soiled ovens. Remember, patience is key – letting the baking soda work its magic over time makes all the difference.
Ready to transform more areas of your home with natural, effective solutions? Check out Savvy Dwelling for more practical cleaning guides and home wellness tips that actually work. Your healthier, cleaner home is just one natural solution away.
Sources:
- How to clean an oven with baking soda, vinegar, lemons and more for quick results
- How to Clean Your Oven with Baking Soda & Vinegar | Family Handyman
- r/CleaningTips on Reddit: Explain like I’m 5: how to clean this disastrous oven
Also See: The Best Essential Oils for Repelling Fleas on Dogs

