5 Proven Ways to Eliminate Weevils From Your Flour (and Keep Them Out for Good)
Opening your flour container to find tiny brown beetles crawling around can make your stomach drop. You’re not alone in this frustrating discovery—weevils are one of the most common pantry pests, and they can multiply rapidly once they’ve found their way into your grain products. The sight of these unwelcome visitors in your baking supplies can feel overwhelming, especially when you’re unsure how far the infestation has spread.
This guide walks you through five research-backed methods to completely eliminate weevils from your flour and prevent future infestations. We’ve simplified the complex science behind weevil behavior into clear, step-by-step solutions that work quickly and effectively. You’ll learn exactly which treatment method works best for your situation, how to safely clean your entire pantry, and the specific prevention habits that keep these pests from returning.
Contents
- At a Glance: The Best Solutions
- The Science Made Simple: Why This Problem Happens
- 1. Immediate Assessment and Quarantine
- 2. The Complete Disposal Method
- 3. The Freezer Treatment for Salvageable Flour
- 4. Heat Treatment for Quick Results
- 5. Deep Pantry Sanitization
- 6. Professional Pest Control Solutions
- 5 Habits to Keep Weevils From Coming Back
- Frequently Asked Questions
- Final Words
- Additional Resources for You:
At a Glance: The Best Solutions
When you’re dealing with weevils in flour, you need quick answers about which method works best for your situation. Each approach has different time requirements and effectiveness levels, so choosing the right one depends on how severe your infestation is and whether you want to salvage the flour.
| Solution Method | Time Required | Effectiveness | Best For |
|---|---|---|---|
| Complete Disposal | 30 minutes | 100% | Heavily infested flour |
| Freezer Treatment | 7 days | 95% | Lightly infested flour you want to save |
| Heat Treatment | 1 hour | 90% | Quick elimination in small batches |
| Full Pantry Cleanout | 2-3 hours | 98% | Widespread infestation |
| Professional Treatment | 1-2 visits | 99% | Persistent or large infestations |
The complete disposal method offers 100% effectiveness because you’re removing all flour weevils along with their food source. However, if you’ve just bought expensive specialty flour or only notice a few weevils, the freezer treatment can eliminate weevils in flour while preserving your investment.
Heat treatment works faster than freezing but requires careful temperature monitoring to avoid damaging the flour’s baking properties. For widespread pantry pest problems, a full cleanout addresses not just the flour weevils but prevents reinfection from hidden eggs in other locations.
Professional pest control becomes necessary when DIY methods fail repeatedly or when you’re dealing with multiple pantry pests beyond just flour weevil issues. The key is matching your chosen method to both the severity of your weevils in flour problem and your household’s specific needs.
The Science Made Simple: Why This Problem Happens
How Weevils Enter Your Flour
Weevils in flour don’t magically appear overnight. These tiny beetles typically arrive in your pantry already present in grain products from processing facilities or storage warehouses. Adult female weevils bore tiny holes into wheat kernels and lay their eggs inside before the grain gets milled into flour.
Sometimes flour weevils hitchhike into your home through contaminated packaging or migrate from nearby infested products. Even the cleanest kitchens can experience weevil problems because the infestation often starts before you bring the flour home.
The Weevil Life Cycle in Your Pantry
Understanding the weevil life cycle helps explain why small problems quickly become major infestations. Adult weevils lay between 300-400 eggs during their lifetime, with each egg developing into a larva within 3-6 days under ideal pantry conditions.
The larvae feed inside flour particles for 13-26 days before pupating for another 5-16 days. This means a single pair of weevils can produce thousands of offspring within just two months. The cycle continues year-round in heated homes, creating multiple overlapping generations.
Why Flour Creates the Perfect Breeding Ground
Flour provides everything weevils need to thrive. The fine texture offers easy burrowing opportunities while the carbohydrate content supplies abundant nutrition for developing larvae. Most pantry storage conditions maintain temperatures between 65-85°F, which accelerates weevil reproduction.
Flour’s low moisture content doesn’t deter these pantry pests because weevils have adapted to survive in dry grain environments. Paper or plastic flour packaging offers minimal protection against adult weevils seeking new breeding sites.
1. Immediate Assessment and Quarantine
Identifying True Weevil Infestations Vs. Other Pantry Pests
Flour weevils measure about 1/8 inch long with distinctive elongated snouts and reddish-brown coloring. Unlike other pantry pests, weevils move slowly and often play dead when disturbed. You’ll typically find them crawling on flour surfaces or container walls rather than flying around.
Look for these specific signs of weevil activity in your flour:
- Small round holes in flour packaging
- Fine webbing or clumping in flour
- Tiny brown or black specks that move
- Sweet, musty odor from infested flour
- Small brown beetles crawling slowly
Isolating All Potentially Affected Items
Move every grain-based product from your pantry to a separate area for individual inspection. This includes flour, cereal, pasta, rice, crackers, and even pet food. Weevils spread between products, so proximity matters more than product type.
Create three sorting categories: clearly infested, suspicious, and clean items. Place each category in separate areas to prevent cross-contamination during your assessment process, just like when you sort laundry. Use good lighting and a magnifying glass for thorough inspection of questionable products.
Creating a Safe Work Area for Cleanup
Set up your workspace away from clean pantry areas to prevent spreading weevils during the elimination process. Cover your work surface with newspaper or disposable plastic sheeting that you can discard afterward. It is also important to ensure that you identify and eliminate any pests in your kitchen, including roaches. To effectively find a roach nest in the kitchen and destroy it, look for hidden areas such as under the sink or behind appliances.
Gather these essential tools before beginning:
- Disposable gloves and face mask
- Sealed garbage bags
- Vacuum cleaner with hose attachment
- Magnifying glass for detailed inspection
- Cleaning cloths and disinfectant
Also See: How to Wash Berries With Vinegar and Baking Soda to Keep Them Fresh for Weeks
2. The Complete Disposal Method
When to Choose Full Disposal Over Salvage
Complete disposal becomes necessary when you find live adult weevils, extensive webbing, or strong musty odors in your flour. These signs indicate advanced infestation with multiple life cycle stages present. Salvage attempts with heavily infested flour rarely succeed and risk spreading the problem.
Choose disposal over treatment when dealing with inexpensive flour products or when you discover the infestation after extended storage periods. The time and effort required for treatment often exceeds the cost of replacement flour.
Safe Disposal Steps to Prevent Spread
Follow this systematic approach to eliminate weevils in flour without creating new problems:
- Double-bag infested flour in sealed plastic bags before moving to disposal area
- Freeze bagged flour for 48 hours to kill remaining live weevils
- Place frozen bags directly into outdoor garbage containers
- Clean and disinfect the original flour containers thoroughly
- Wipe down surrounding pantry surfaces where flour containers were stored
- Vacuum the work area and dispose of vacuum bag immediately
What Containers and Tools You’ll Need
Heavy-duty garbage bags prevent weevils from escaping during transport and disposal. Double-bagging provides extra security against tears or holes that could release live insects back into your home environment.
Essential disposal supplies include:
- 2-mil thick plastic garbage bags
- Twist ties or bag clips for secure sealing
- Disposable gloves for handling infested materials
- Disinfectant spray for container cleaning
- Paper towels for cleanup
- Freezer space for pre-disposal treatment
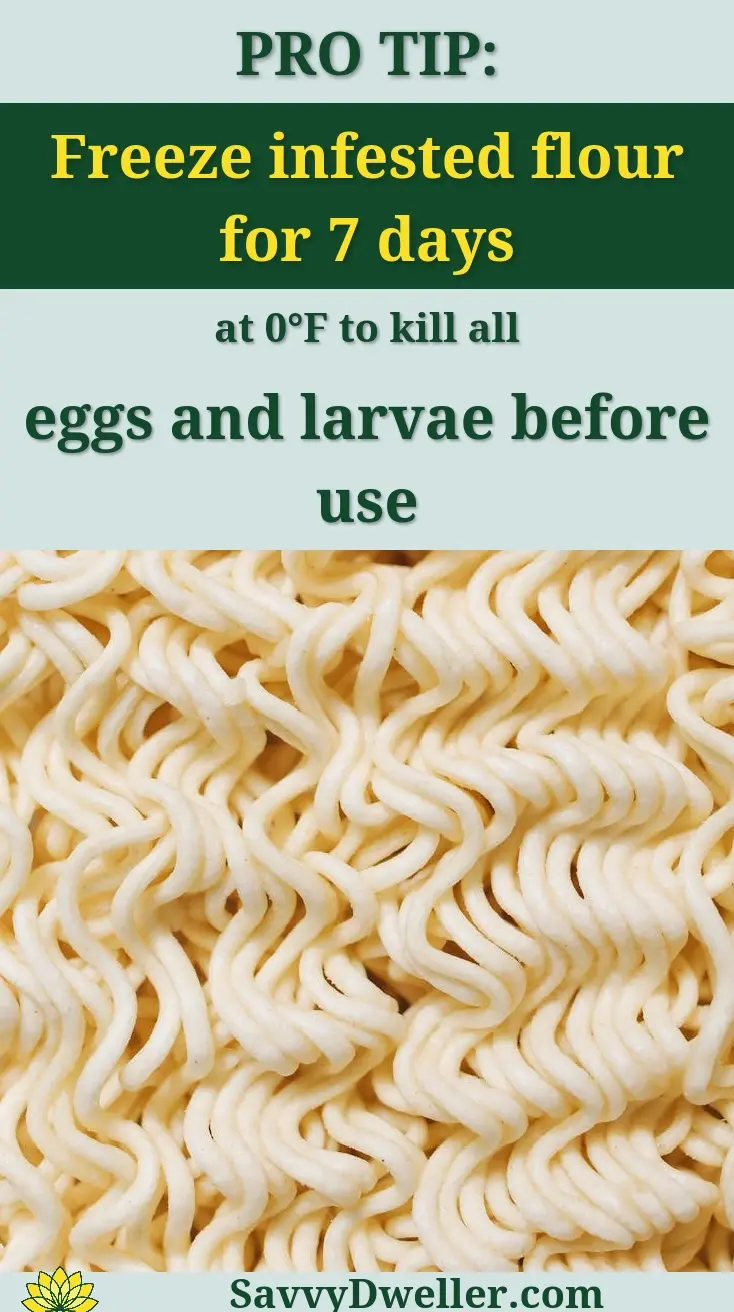
3. The Freezer Treatment for Salvageable Flour
How Cold Temperatures Eliminate Weevils and Larvae
Freezing stops metabolism in flour weevils, then ice crystals rupture delicate tissues in eggs, larvae, and adults. At 0°F (-18°C), the cold penetrates slowly but thoroughly, which is why time matters.
Seven full days at 0°F reliably kills all life stages hiding in a bag’s center, not just the surface. Colder chest freezers near -4°F (-20°C) can do the job in 4 days, but home freezers vary, so extra time builds a safety margin.
Step-by-step Freezing Process
- Zip-top freezer bags (heavy-duty), airtight canisters, or vacuum-seal bags
- Permanent marker and labels
- Freezer thermometer
- Sheet pan for flattening bags
- Fine-mesh sieve for post-freeze sifting
- Check temperature. Place a freezer thermometer on the shelf you’ll use. Aim for 0°F (-18°C) or colder.
- Repackage. Transfer flour to sealed freezer bags in 1–2 lb portions. Press flat on a sheet pan so the layer stays under 1 inch thick for faster, deeper chilling.
- Label. Mark each bag with “Freezer treatment,” date, and type (e.g., all-purpose, whole wheat).
- Freeze. Lay bags flat. Keep them in the freezer for 7 days at 0°F (-18°C); if your unit holds -4°F (-20°C), 4 days can suffice.
- Avoid door storage. Use a back shelf where temperatures stay most stable.
- Thaw in-package. Move flour to the counter and let it come to room temperature while still sealed to prevent condensation clumps.
Post-freezing Flour Assessment and Use
Open and inspect. No movement should be visible, and the flour should smell neutral-no musty or sour notes.
Sift through a fine-mesh sieve to remove dead insects and tiny clumps. Use salvaged flour for fully cooked recipes (breads, pancakes, muffins), not raw preparations.
Many ask, “can you eat flour with weevils in it?” Freezer treatment and sifting help eliminate weevils in flour; choose based on your comfort and quality expectations. Store treated flour in airtight containers to keep pantry pests from returning.

4. Heat Treatment for Quick Results
Oven Method for Small Batches
Heat is the fastest way to get rid of weevils in flour when you only need to rescue a few cups. It kills adults and eggs quickly but can slightly toast flavor if you overdo it.
- Preheat oven to 250°F (121°C). Place an oven thermometer inside to verify accuracy.
- Spread flour in a thin layer (¼–½ inch) on a parchment-lined rimmed baking sheet.
- Heat for 20–30 minutes, stirring at the 10–15 minute mark. Target an internal flour temperature of 140–160°F (60–71°C).
- Remove from oven when time/temperature is reached. Let the sheet sit on a cool rack.
- Once fully cool, sift to remove any debris and break up hot spots or lumps.
Temperature Guidelines and Safety Precautions
- Stay around 250°F (121°C) to how to kill weevils in flour without scorching or altering baking performance too much.
- Do not exceed 300°F (149°C); high heat can brown flour and change gluten behavior.
- Use shallow layers; thick piles insulate eggs at the center.
- Never leave the oven unattended. Keep kids and pets away from hot trays.
- Handle sheets with dry oven mitts; steam can escape when stirring.
- Expect mild flavor shifts with sensitive recipes. For delicate cakes, consider fresh flour instead.
Cooling and Storage After Heat Treatment
- Cool completely on the tray to room temperature. Warm storage invites condensation and clumps.
- Sift and aerate. This removes any remaining particles and evens texture for baking.
- Store in airtight containers with tight gaskets. This simple switch helps how to get rid of weevils in your flour long-term.
- Label as “Heat-treated” with the date. Use heat-treated flour in cooked recipes first; keep untreated flour quarantined or frozen.
5. Deep Pantry Sanitization
Removing Everything for Complete Access
Empty shelves give you reach into seams, screw holes, and hidden corners-where flour weevil eggs love to hide. Move all grains, flour, pasta, and baking mixes into sealed bins for temporary quarantine.
Sort as you pull. Discard anything with active insects, webbing, or off odors. Wipe up loose spills immediately so you don’t spread weevils flour dust elsewhere. Keeping your space clean is vital, especially when looking to deter pests like termites. Exploring natural methods for termite control can make a significant difference in maintaining a pest-free environment.
Natural Cleaning Solutions That Work
Simple, food-safe cleaners are perfect for how to get rid of weevils in flour fast without harsh chemicals. Use vinegar to cut residue, then a light essential oil wipe as a deterrent—not a pesticide. These methods are especially helpful for those who prefer natural remedies for pest control.
White Vinegar Deep Clean
- Mix either full-strength white vinegar or a 1:1 vinegar–warm water solution in a spray bottle.
- Spray shelves, vertical walls, undersides, and hardware. Let sit 3–5 minutes to soften sticky flour films that trap pantry pests.
- Wipe with a microfiber cloth, pushing debris toward a dustpan-don’t brush it into crevices.
- Remove shelf pins and brackets; soak or wipe them with vinegar too.
- Q-tip detail. Swab screw holes, seams, and joints where flour weevils linger.
Essential Oil Deterrent Wipes
- In a labeled bottle, combine 1 cup water + 1 tbsp alcohol (vodka or isopropyl) + 15–20 drops total of peppermint, clove, or eucalyptus oil.
- Shake and lightly spray a cloth-don’t saturate shelves. Wipe edges, undersides, and door frames to create a light, pleasant deterrent barrier.
- Let surfaces dry fully before restocking. Keep oils away from direct food contact and avoid use around sensitive pets.
Vacuum and Crevice Cleaning Techniques
Use a crevice tool with a HEPA vacuum. Trace every seam, shelf lip, corner, hinge, and drawer slide where fine flour dust collects. Be sure to pay extra attention to any areas where kitchen cabinets may have accumulated grease or grime, as these can trap dust more stubbornly.
- Vacuum from top to bottom so debris doesn’t re-settle on clean areas.
- Insert the nozzle into shelf pegs and screw holes for 3–5 seconds to pull out hidden particles.
- Immediately seal and discard the vacuum bag outdoors, or wash the canister with hot soapy water and dry.
- (Optional) Lightly dust deep cracks with a pinch of food-grade diatomaceous earth; keep it out of food zones and wipe any visible excess.
Drying and Preparation for Restocking
Run a fan or leave doors open for 30–60 minutes until every surface feels bone-dry. Moisture invites clumping and more pantry pest problems.
- Lay washable shelf liners for easy crumb control.
- Restock only clean, sealed items. Freeze new flour 48–72 hours before it enters the pantry to eliminate weevils in flour.
- Use airtight containers for all grains and baking mixes. Label dates and practice first-in, first-out rotation.
- Place a couple of sticky pantry pest monitors at the back corners to track any stragglers-check weekly.
These steps show how to get rid of weevils in my flour and keep them from coming back-by treating the food and the space. If you ever wonder how to remove weevils from flour versus how to kill weevils in flour, pair freezing or heat with a thorough pantry reset.
6. Professional Pest Control Solutions
When DIY Methods Aren’t Enough
If you keep finding flour weevils after a full cleanout and careful storage, bring in a licensed pro. Persistent weevils in flour usually mean hidden sources you can’t access, like wall voids, subfloor cracks, or shared pantry spaces in multi-unit buildings.
- Live adults or larvae appearing 2–3 weeks after you cleaned and restocked.
- Pinholes in unopened grain packages or constant “gritty” dust (frass) on shelves.
- Infestation across multiple rooms or storage areas.
- Recurring activity despite freezing, heat treatment, and deep sanitization.
- Large volumes of dry goods (bulk bins, home baker’s stock) you can’t cycle quickly.
What to Expect From Professional Treatment
Pros focus on identification, targeted treatments, and monitoring-not blanket spraying. You’ll get a plan suited to the exact pantry pest species (rice/granary/maize weevil) and your home’s layout.
They offer guidance on natural, plant-friendly remedies for indoor garden pests as well.
- Inspection and ID: Visual checks, trap placement, and species confirmation so they know exactly how to get rid of weevils in flour fast without guesswork.
- Source tracing: Checking baseboards, wall voids, toe-kicks, attic/crawl spaces, and seldom-used food stores to find the origin of weevils flour issues.
- Targeted applications:
- Crack-and-crevice treatments with products labeled for stored-product pests (often microencapsulated pyrethroids).
- Insect growth regulators (e.g., hydroprene) to break the life cycle.
- Desiccant dusts (silica or food-grade diatomaceous earth) in voids where weevils travel.
- Pheromone monitors for grain weevils to track activity over 4–8 weeks.
- Sanitation and storage guidance: How to remove weevils from flour moving forward-FIFO rotation, sealed containers, and stock sizing so you don’t overstore.
- Follow-up: A recheck visit if needed until traps show zero activity. Expect clear re-entry times and safety instructions if chemical products are used.
Preparing Your Home for Professional Service
A little prep makes treatment faster, safer, and more thorough. Here’s how to get rid of weevils in your flour with professional help-without chaos in your kitchen.
- Bag and label: Place all shelf-stable foods in sealable bags or airtight bins and label “keep,” “question,” or “discard.” Don’t mix new and old stock.
- Clear access: Empty pantry shelves, remove drawer contents, and pull portable shelves 6–12 inches from the wall.
- Contain crumbs: Vacuum shelves and floor edges so treatments contact surfaces, not debris. Dispose of the vacuum bag outside immediately.
- Protect people and pets: Plan to keep kids, pets, and aquariums away per your technician’s guidance. Cover fish tanks and turn off air pumps if requested.
- Share details: Tell the pro what you’ve tried (freezer, heat, deep clean), where you saw activity, and any sensitivities in your household.
- Post-visit storage: Keep food sealed until the technician confirms safe re-entry and surfaces are dry, then restock in airtight containers only.
5 Habits to Keep Weevils From Coming Back
Airtight Container Storage Systems
Air, gaps, and paper bags invite pantry pests-gasketed containers shut that door. This is the simplest way to eliminate weevils in flour long-term.
- Best options: Glass jars with silicone gaskets, stainless canisters, or thick BPA-free plastic with locking lids (truly airtight).
- Skip: Thin snap-lid tubs without gaskets and leaving flour in original paper bags.
- Choose sizes you’ll empty within 4–8 weeks to limit weevil breeding windows.
- Decant every new bag; never “top off” old flour to avoid spreading hidden eggs.
- Label and date each container; practice FIFO so old stock is used first.
- Keep scoops outside containers to avoid introducing crumbs from other foods.
- Store bulk backup flour in the freezer; keep only 2–4 weeks’ worth in the pantry.
Regular Pantry Inspection Schedules
A 10-minute monthly check catches problems before they spread. Consistency beats heroic cleanups when dealing with how to get rid of flour weevils fast.
- Scan shelves for pinholes in packages, dusty residue, or tiny beetle-like adults.
- Check corners, shelf brackets, and door hinges where pests hide and travel.
- Shake-and-look: Tap each grain container; watch for movement before opening.
- Replace or wash shelf liners every 6–12 months to remove hidden eggs.
- Log findings on your phone so you can spot patterns over time.
- Optional: Use weevil-specific pheromone monitors to verify you fully got rid of weevils in flour.
New Purchase Quarantine Protocols
Quarantine new dry goods so stowaways never enter your system. This is the “seatbelt” for anyone asking how to get rid of weevils in my flour-and keep them gone.
- At the store: Pick intact packages with no pinholes, tears, or powdery seams.
- Freeze high-risk items (flour, rice, grains, pasta, legumes, birdseed) at 0°F/-18°C for 72 hours to kill eggs and larvae. For belt-and-suspenders, freeze 5–7 days.
- Thaw sealed to prevent condensation, then decant into airtight containers.
- No-freezer option: Hold new purchases in a sealed tote for 2 weeks with a monitor; discard or refreeze if you see activity.
- Never combine new flour with existing flour until it passes quarantine.
People ask, “can you eat flour with weevils in it?” Focus on prevention so you don’t face that choice; these steps make how to remove weevils from flour a rare task.
Temperature Control Strategies
Cool and dry pantries slow the weevil life cycle and reduce breeding. Heat and humidity accelerate every stage.
- Measure: Place a small thermo-hygrometer in your pantry; aim for under 75°F (24°C) and under 55% RH.
- Relocate heat sources: Don’t store flour near ovens, dishwashers, or warm appliance vents.
- Dry the air: Use a mini dehumidifier or desiccant packs (silica gel) in cabinets.
- Smart storage: Keep long-term flour in the freezer; move only what you’ll use in a few weeks to the pantry.
- Seasonal check: In summer, tighten inspections and reduce on-shelf quantities.
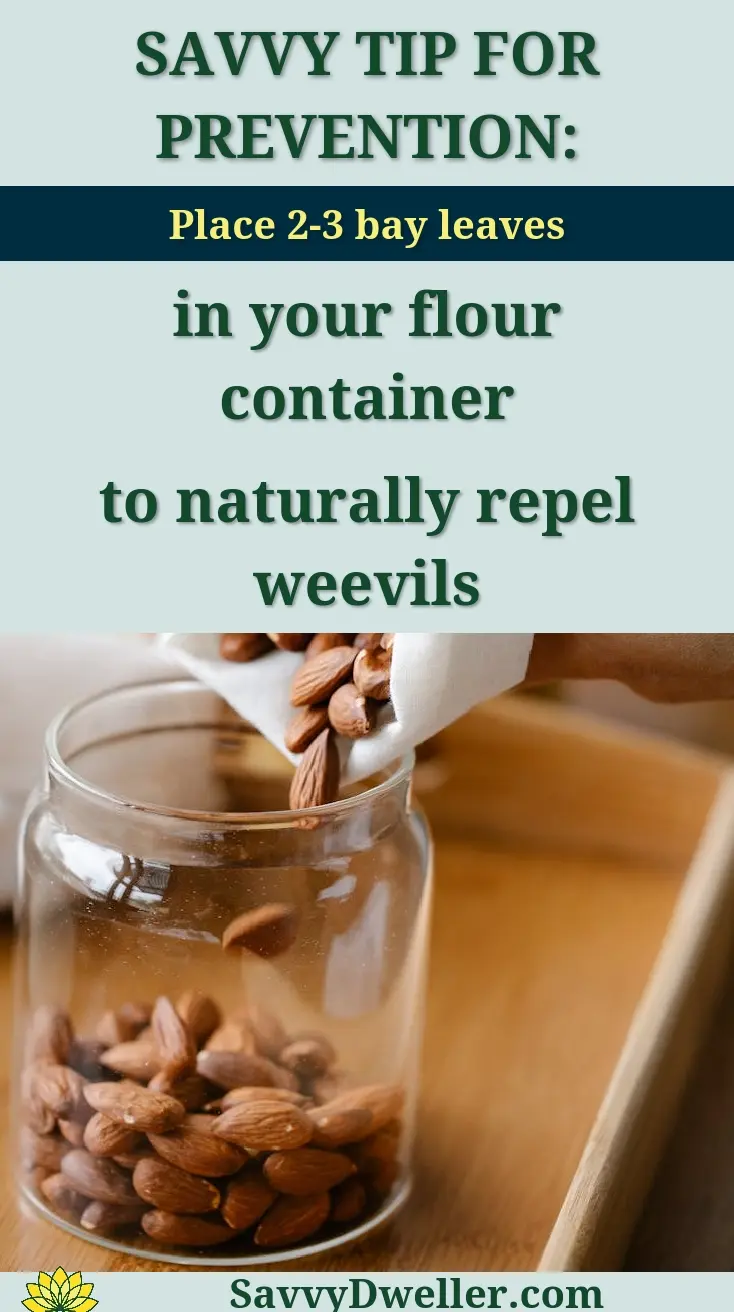
Natural Deterrent Maintenance
Natural tools don’t replace airtight storage, but they add friction for pantry pests. Think of them as ongoing barriers, not cures. Protecting fruit trees from pests also requires similar natural methods to create a sustainable growing environment. Utilizing companion planting or natural repellents can be effective ways to safeguard your trees without harmful chemicals.
- Refresh botanical sachets monthly: Whole cloves, bay leaves, or rosemary in breathable muslin bags placed at the back of shelves.
- Light dusting: Apply a whisper-thin line of food-grade diatomaceous earth into deep cracks and voids every 3 months; keep it off food-contact surfaces.
- Seal routes: Caulk gaps along baseboards, shelf edges, and pipe penetrations where flour weevils travel.
- Monitor quietly: Keep weevil pheromone lures or pitfall traps dated and replace per label to confirm you did get rid of weevils in flour.
- Keep it dry: Wipe shelves with a dry microfiber cloth during inspections so scents remain and moisture doesn’t invite pests.
- Supplies to keep on hand: Muslin sachets, whole spices (cloves/bay), food-grade diatomaceous earth, caulk, labeled monitoring traps.
These habits turn “how to kill weevils in flour” into “they never got a foothold.” Use them together to handle pantry pest risks without constant emergencies.
Frequently Asked Questions
Are Weevils Harmful to Human Health if Accidentally Consumed?
Accidentally consuming weevils or their larvae is generally not harmful to most people. Weevils are not known to carry diseases that affect humans, and they are not poisonous. However, some individuals might experience mild allergic reactions or digestive discomfort. It’s best to discard infested flour to avoid any potential issues, as the presence of weevils can indicate unsanitary conditions.
Can Weevils Infest Unopened or Sealed Packages Of Flour?
Yes, weevils can sometimes infest sealed packages. Female weevils can lay eggs on grains before packaging, and the larvae hatch inside. While airtight packaging helps, it’s not foolproof. Always inspect new flour packages for tiny holes, webbing, or dust before purchase. Transfer flour to airtight containers immediately after bringing it home to prevent any hidden infestations from spreading.
What Should I Do if I’ve Already Used Infested Flour in Cooking?
If you’ve used flour with weevils in cooking, the heat from baking or cooking typically kills any weevils or eggs, making it safe from a health perspective. However, the quality and taste of the food might be affected. Discard any remaining infested flour and thoroughly clean your kitchen utensils and surfaces to prevent cross-contamination. In the future, always sift and inspect flour before use.
How Can I Prevent Weevils From Spreading to Other Pantry Items During an Infestation?
To prevent spread, immediately quarantine all infested items in sealed plastic bags and dispose of them outside your home. Clean the entire pantry with a vinegar solution, paying attention to cracks and corners. Store all dry goods, including spices and pasta, in glass or hard plastic airtight containers. Regularly vacuum pantry shelves to remove any stray eggs or larvae that might have escaped. Understanding why pantry moths appear can help in preventing future infestations.
Final Words
You now have a complete arsenal of proven methods to eliminate weevils from your flour and reclaim your pantry. Whether you choose the immediate disposal method for heavily infested flour or the freezer treatment to save your precious baking supplies, these research-backed solutions will restore your kitchen’s cleanliness and your peace of mind.
The key to long-term success lies in combining immediate action with consistent prevention habits. Start with the assessment and quarantine steps today, then implement the airtight storage and regular inspection routines that will keep these persistent pests from returning. Remember, even small changes like freezing new flour purchases for 48 hours can prevent future infestations entirely.
Ready to tackle those weevils head-on? Choose the method that best fits your situation from our guide above and take action today. For more practical pest control solutions and home maintenance tips that actually work, explore Savvy Dwelling and stay connected with us for reliable advice you can trust.

