The Ultimate Guide to Cleaning Dirty Tile Grout and Making It White Again
Staring at discolored, grimy grout lines that make your entire bathroom or kitchen look dirty and neglected? You’re not alone in feeling frustrated when scrubbing with regular cleaners barely makes a dent in those stubborn stains. That dingy grout isn’t just unsightly—it’s likely harboring bacteria and mold that can affect your home’s cleanliness and air quality.
This comprehensive guide breaks down six proven methods that actually work to restore your grout to pristine whiteness. We’ve tested these techniques extensively and simplified the science behind why each method works, so you can choose the right approach for your specific grout type and staining situation. You’ll have the knowledge and confidence to tackle even the most stubborn grout discoloration with materials you likely already have at home.
Contents
- At a Glance: The Best Solutions
- The Science Made Simple: Why Grout Gets Dirty and Discolored
- 1. The Baking Soda Power Paste Method
- 2. The Hydrogen Peroxide Brightening Treatment
- 3. The Oxygen Bleach Deep Clean Method
- 4. The Commercial Grout Cleaner Approach
- 5. The Steam Cleaning Professional Method
- 6. The Grout Pen and Recoloring Solution
- Essential Tools and Safety Equipment for Grout Cleaning
- 5 Habits to Keep Your Grout White and Clean
- Frequently Asked Questions
- Final Words
- Sources:
At a Glance: The Best Solutions
Quick Reference Table: Grout Cleaning Solutions
| Solution Type | Best For | Grout Compatibility | Time Required | Stain Removal Power |
|---|---|---|---|---|
| Baking Soda Paste | Light to moderate grime, everyday maintenance | All types (including unsealed) | 15–30 minutes | Medium |
| Hydrogen Peroxide | Mold, mildew, organic stains | Cement-based, unsealed grout | 20–40 minutes | High |
| Oxygen Bleach | Deep-set discoloration, heavily soiled areas | Sealed and unsealed (not for colored grout) | 30–60 minutes | Very High |
| Commercial Grout Cleaners | Stubborn stains, time-sensitive cleaning | Check label-varies by formula | 10–25 minutes | High to Very High |
| Steam Cleaning | Sanitizing, grime removal without chemicals | Sealed grout preferred | 20–50 minutes | Medium to High |
| Grout Pens | Permanently stained or aged grout | All types (cosmetic fix only) | 30–60 minutes (including drying) | N/A (covers, doesn’t clean) |
How to Choose the Right Method for Your Grout Type
Not all grout is created equal-and using the wrong cleaning method can do more harm than good. Cement-based grout, the most common type in homes, is porous and absorbs moisture readily, making it prone to staining but also responsive to natural cleaners like baking soda and hydrogen peroxide. Epoxy grout, on the other hand, is non-porous and highly stain-resistant, so it rarely needs aggressive cleaning.
If your grout is unsealed or older than 2 years without resealing, avoid chlorine bleach-it can degrade the material over time. Instead, lean toward oxygen-based cleaners or gentle pastes. For colored grout, skip anything labeled “whitening” or “bleaching,” as it may strip pigment.
- Identify your grout type: Run a water droplet test-if it soaks in within seconds, it’s porous (likely cement-based and unsealed).
- Assess the stain: Mold and mildew respond best to hydrogen peroxide; hard water deposits need acidic solutions like vinegar (used cautiously); general grime yields to baking soda.
- Check for sealant: Shine a flashlight across the grout-if it looks slightly glossy or water beads up, it’s sealed. Steam or pH-neutral commercial cleaners work well here.
- Match method to location: For how to clean shower grout or how to clean bath tile grout, prioritize mold-fighting power. For kitchen floors, focus on grease-cutting and grit removal.
When in doubt, start gentle. Aggressive scrubbing or harsh chemicals can erode grout lines, making future cleaning dirty tiles and grout even harder. A mild baking soda paste is almost always a safe first step for how to clean dirty tile grout without risk.
The Science Made Simple: Why Grout Gets Dirty and Discolored
Understanding Grout Porosity
Grout is inherently porous—especially cement-based types—which means it readily absorbs moisture, oils, and dirt. This absorbency is why even light foot traffic or humidity can leave behind a trail of discoloration over time. Unsealed grout acts like a sponge, pulling in everything from soap residue to spilled beverages, making it a magnet for stains. To protect your grout and keep it looking fresh, resealing it regularly can prevent stubborn stains from forming. Properly resealing your grout creates a barrier that keeps moisture and dirt at bay, extending its lifespan and maintaining its appearance.
Common Culprits Behind Grout Staining
Soap Scum and Mineral Deposits
In bathrooms and showers, soap scum combines with hard water minerals like calcium and magnesium to form a chalky, off-white film that clings to grout lines. This isn’t just unsightly-it creates a rough surface that traps more grime, accelerating further discoloration.
Mold and Mildew Growth
Constant moisture in showers, tub surrounds, and kitchen backsplashes creates the perfect breeding ground for mold and mildew. These fungi don’t just stain grout black or green—they can also cause lingering odors and degrade grout integrity if left unchecked. To combat this, consider using natural methods to eliminate mold and mildew, which can be both effective and safe for your home. By leveraging ingredients like vinegar and baking soda, it’s possible to keep these unwanted fungi at bay without harsh chemicals.
Daily Wear and Grime Buildup
On floors, grout collects tracked-in dirt, cooking oils, pet dander, and everyday debris. Without regular maintenance, this buildup embeds deep into the pores, dulling white grout to a gray or yellowish hue. High-traffic zones show wear fastest, turning clean tile grout into a visible record of daily life.
1. The Baking Soda Power Paste Method
What You’ll Need
- ½ cup baking soda
- ¼ cup water (or white vinegar for tougher stains)
- Soft-bristle grout brush or old toothbrush
- Spray bottle with water
- Clean microfiber cloths
Step-by-step Application Process
- Mix baking soda and water to form a thick paste-similar in consistency to toothpaste.
- Apply the paste directly onto the dirty tile grout using your finger or a small spatula, ensuring full coverage of stained lines.
- Let it sit for 10–15 minutes to penetrate surface grime.
- Scrub aggressively with your brush using back-and-forth motions; focus on discolored sections.
- Mist the area with water to loosen residue, then wipe clean with a damp microfiber cloth.
- Repeat if needed, especially for heavily stained grout in showers or kitchen backsplashes.
Why This Method Works So Well
Safe for Most Grout Types
Baking soda is non-corrosive and pH-neutral, making it gentle enough for both sealed and unsealed grout-whether in your bathroom tiles or kitchen floor. It lifts grime without etching or discoloring, unlike harsh chemical cleaners that can degrade grout over time.
Natural Whitening Power
The mild abrasiveness of baking soda physically scrubs away surface buildup, while its alkaline nature helps neutralize acidic residues like soap scum. This dual action not only removes stains but also brightens grout naturally-no bleach required.
Also See: The Best DIY Dishwasher Detergent Recipe (That Works)
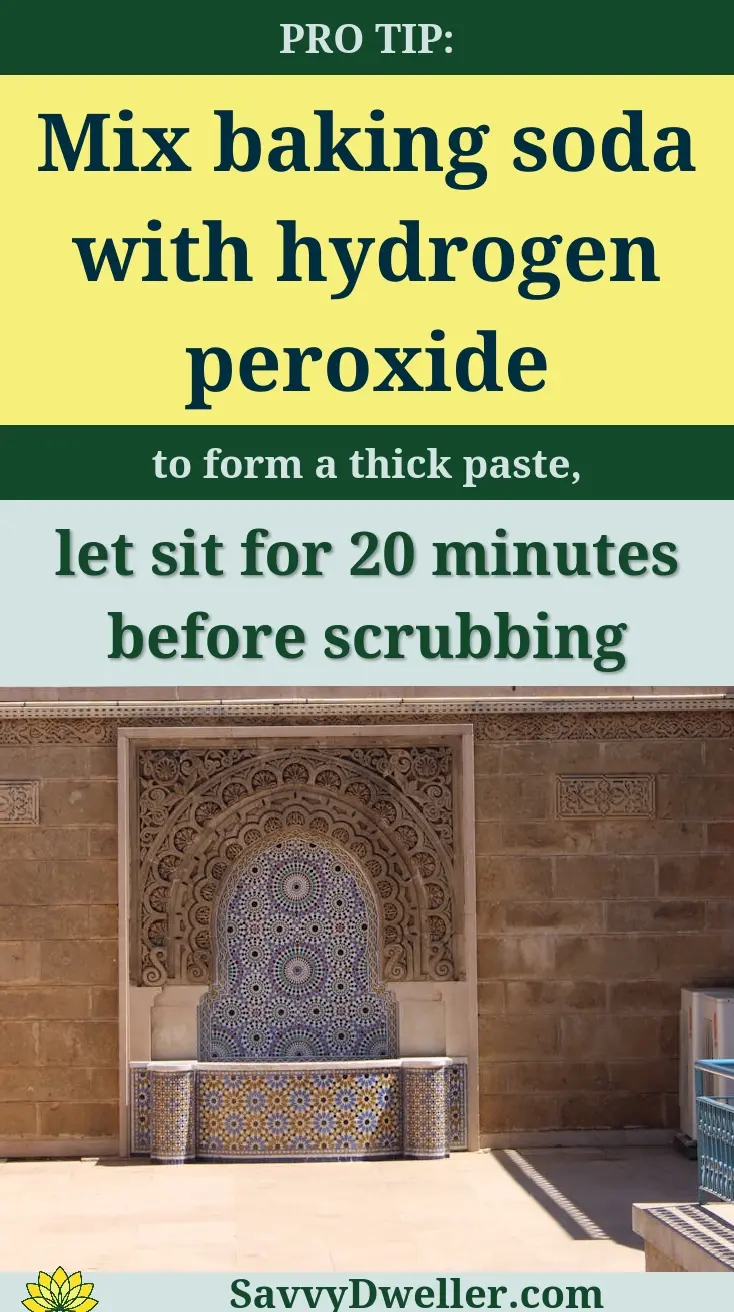
2. The Hydrogen Peroxide Brightening Treatment
Materials and Safety Precautions
- 3% hydrogen peroxide (standard drugstore strength)
- Baking soda (optional, for paste enhancement)
- Spray bottle or small bowl
- Grout brush or stiff toothbrush
- Gloves and eye protection (recommended for prolonged use)
Always work in a well-ventilated area. Though 3% hydrogen peroxide is low-risk, it can bleach fabrics or irritate skin with extended contact.
The Complete Cleaning Process
- Pour hydrogen peroxide into a spray bottle or small bowl.
- For light stains, spray directly onto grout lines. For tougher discoloration, mix with baking soda to form a reactive paste.
- Let it bubble and sit for 10–20 minutes-the fizzing action helps break down organic matter.
- Scrub thoroughly with your brush, paying extra attention to corners and grout in shower stalls.
- Rinse with clean water and dry with a microfiber towel to prevent water spots.
Best Results for Different Stain Types
Organic Stains and Discoloration
Hydrogen peroxide excels at tackling biological stains—like mildew, mold, or food spills—because it oxidizes and deactivates the organic compounds causing the discoloration. This makes it one of the most effective DIY ways to clean stained tile grout without toxic fumes. Additionally, hydrogen peroxide is incredibly versatile and can be used for various other tasks around the house. Exploring its many surprising uses can help enhance your cleaning routine and ensure a healthier living environment.
Light to Moderate Grime
For everyday buildup on bathroom tile grout or kitchen backsplashes, hydrogen peroxide lifts surface dirt while gently whitening. It’s less abrasive than commercial grout cleaners, yet powerful enough to refresh grout that’s lost its brightness from soap scum and humidity exposure.
3. The Oxygen Bleach Deep Clean Method
When to Choose Oxygen Bleach Over Regular Bleach
Oxygen bleach is a gentler, color-safe alternative to chlorine bleach-making it ideal for cleaning dirty tile grout without risking damage to colored tiles or grout. Use oxygen bleach when you need a powerful, non-toxic cleaner that won’t strip sealants or irritate your lungs like chlorine-based products can. It’s especially effective for organic stains like mold, mildew, and soap scum on bathroom tiles and shower grout.
Mixing and Application Instructions
Oxygen bleach comes as a powder that activates when mixed with water. Always follow the manufacturer’s ratio, but a standard mix is 1 part powder to 4 parts warm (not hot) water. Here’s how to apply it:
- Clear the area of rugs, bath mats, or shower curtains.
- Mix the solution in a non-metallic container-plastic or glass works best.
- Pour or sponge the mixture directly onto the grout lines, ensuring full saturation.
- Let it sit for 15–30 minutes; do not let it dry out. Re-wet if needed.
- Proceed to scrub (see next section) before rinsing thoroughly with clean water.
Scrubbing Techniques That Work
Patience and proper technique make all the difference when you’re trying to clean stained tile grout. Aggressive scrubbing can wear down grout over time-gentle, consistent pressure yields better long-term results.
Proper Tool Selection
- An old toothbrush for tight corners and detailed work
- A grout brush with stiff nylon bristles for larger areas
- An electric scrub brush (like a cordless grout cleaner) for deep-set grime
Avoid metal brushes or abrasive pads-they can scratch tiles and erode grout.
Working in Manageable Sections
Tackle 2–3 square feet at a time. This prevents the solution from drying before you scrub and keeps you from feeling overwhelmed. After rinsing one section, move to the next-this method ensures even coverage and consistent results across your entire tiled surface.

4. The Commercial Grout Cleaner Approach
Top-rated Commercial Products
Not all store-bought grout cleaners are created equal. For reliable results in cleaning dirty grout, look for formulas that are pH-neutral, non-acidic, and free from harsh fumes. Some consistently well-reviewed options include effective store-bought grout cleaners for floors.
- CLR Bath & Kitchen Cleaner
- Soft Scrub with Bleach Cleaner Gel
- Tilex Mold & Mildew Remover
- Simple Green Stone & Grout Cleaner
These products are formulated specifically for removing stains from grout while being safe for most tile surfaces when used as directed.
Application Tips for Maximum Effectiveness
- Test the cleaner on a small, hidden grout line first.
- Apply directly to grout using the nozzle or a small brush-avoid overspray on tiles if the product isn’t tile-safe.
- Let it dwell for the time specified (usually 3–10 minutes).
- Scrub with a grout brush using circular motions to lift embedded grime.
- Rinse immediately with water and dry with a clean microfiber cloth to prevent streaking.
Cost Vs. Results Analysis
Commercial grout cleaners range from $4 to $15 per bottle. While pricier than DIY options like baking soda or oxygen bleach, they often deliver faster results on tough mold, mildew, and soap scum-especially in showers and bathroom floors. For quick cleanups or recurring maintenance, they’re a time-saving investment; for deep restoration, they may need to be combined with mechanical scrubbing or sealing afterward, especially when dealing with mold and mildew on bathroom grout.
5. The Steam Cleaning Professional Method
Equipment You’ll Need
- A handheld or canister steam cleaner with a grout brush attachment
- Distilled water (to prevent mineral buildup in the machine)
- Microfiber cloths for drying
- Grout sealer (for post-cleaning protection)
Steam cleaners use only vapor-no chemicals-making this a great choice for families with sensitivities or homes with pets.
Safe Steam Cleaning Technique
- Fill the steam cleaner with distilled water and heat until ready.
- Attach the grout brush or narrow nozzle for precision.
- Hold the nozzle 1–2 inches from the grout line and move slowly-about 1 inch per second.
- Let the steam loosen dirt for a few seconds before gently brushing the area.
- Wipe away residue immediately with a dry microfiber cloth to avoid re-depositing grime.
Never hold the steam in one spot for more than 10 seconds-excessive moisture can weaken unsealed grout over time.
When Steam Cleaning is Most Effective
Steam excels at cleaning surface-level grime, grease, and light mildew-ideal for routine maintenance on kitchen backsplashes or lightly soiled bathroom tiles. It’s less effective on deeply stained or discolored grout unless paired with a pre-treatment.
Sealed vs. Unsealed Grout Considerations
Sealed grout repels moisture, making it safer for frequent steam cleaning. Unsealed grout is porous and can absorb excess water, potentially promoting mold growth underneath. If your grout isn’t sealed, limit steam sessions and always dry the area completely afterward-or better yet, seal it before using steam regularly.
Combining Steam with Other Methods
For stubborn stains, apply oxygen bleach or a commercial cleaner first, let it dwell, then use steam to activate and rinse the solution away. This hybrid approach leverages chemical action and thermal power without over-wetting the surface—perfect for how to clean bath tile grout that’s seen years of buildup. Knowing the right techniques can make all the difference when tackling dirty grout and restoring your floors to their original shine.
6. The Grout Pen and Recoloring Solution
When Cleaning Isn’t Enough
Sometimes, even the best dirty tile grout cleaning efforts won’t bring back your grout’s original color-especially if it’s deeply stained, unevenly faded, or was never white to begin with. Grout pens and recoloring kits offer a cosmetic reset, not a deep clean, but they’re a smart fix when you’ve exhausted all how to clean grout options. They work best on grout that’s structurally sound but visually compromised.
Choosing the Right Grout Pen Color
Selecting the wrong shade can make your clean tile grout look patchy or artificial. Most brands offer a range of neutrals, from bright white to soft gray or beige. Always test the pen on a small, inconspicuous area first and let it dry completely-colors can appear lighter or darker once cured. For bathrooms and kitchens, a true white or off-white often gives the crispest look, while warmer tones can hide future minor discoloration better.
Professional Recoloring Application
While grout pens are DIY-friendly, achieving professional-looking results takes care and consistency. The key is preparation and patience.
Preparation Steps
- Clean the grout thoroughly using one of the earlier methods (like oxygen bleach or baking soda paste) to remove all surface grime, soap scum, and mildew.
- Ensure the area is completely dry-any moisture will prevent the colorant from adhering properly.
- Use painter’s tape along tile edges if you want ultra-crisp lines, though many pens have fine tips that minimize bleed.
- Apply the colorant in smooth, even strokes, pressing the tip gently into the grout line to saturate it fully.
- Let it dry for the time specified (usually 1–2 hours), then apply a second coat if needed for uniformity.
Long-Term Maintenance
Recolored grout isn’t maintenance-free. To preserve your refreshed look, avoid acidic cleaners like vinegar, which can break down the colorant over time. Stick to pH-neutral grout cleaners, and reapply the pen every 12–18 months in high-moisture areas like showers. A grout sealer applied after the color has fully cured (check product instructions) can significantly extend its life.
Essential Tools and Safety Equipment for Grout Cleaning
Must-have Cleaning Tools
Having the right gear makes the difference between scrubbing for hours and getting clean grout efficiently.
Brushes and Scrubbing Tools
- Grout brush with stiff nylon bristles-angled heads reach into corners.
- Old toothbrush-perfect for precision spots on shower grout or tight corners.
- Scrubbing sponge with abrasive side-for lighter stains on sealed grout.
- Spray bottle-for evenly applying cleaning solutions like hydrogen peroxide or DIY pastes.
- Microfiber cloths-to wipe away residue without scratching tiles.
Protective Gear
- Latex or nitrile gloves-protect skin from bleach, peroxide, and commercial grout cleaners.
- Safety goggles-prevent splashes when scrubbing overhead or using sprays.
- Face mask (optional for strong fumes)-recommended when using oxygen bleach or commercial products in poorly ventilated bathrooms.
Tools to Avoid That Can Damage Grout
Aggressive tools can do more harm than good. Stay away from wire brushes, steel wool, or electric grinders-these erode porous grout, creating grooves where dirt and mold thrive. Similarly, high-pressure steam wands held too close or used too long can weaken unsealed grout over time. Gentle, consistent scrubbing always wins over brute force.
5 Habits to Keep Your Grout White and Clean
Daily Prevention Strategies
Prevent buildup before it starts. After showering, squeegee walls or wipe down tiles with a dry microfiber cloth to reduce moisture and soap residue. In kitchens, quickly mop up spills near tiled backsplashes. These tiny actions dramatically cut down on how often you’ll need a full how to clean dirty grout session.
Weekly Maintenance Routine
- Spray grout lines with a 1:1 mix of water and hydrogen peroxide (or a gentle commercial grout cleaner).
- Let it sit for 5–10 minutes to loosen surface grime.
- Gently scrub with a soft grout brush.
- Rinse with a damp cloth and dry the area.
Seasonal Deep Cleaning Schedule
Mark your calendar: once every three months, give your bathroom and kitchen grout a full treatment using oxygen bleach or a baking soda paste. This tackles embedded stains before they become permanent and keeps your cleaning routine from turning into a weekend-long battle.
Proper Ventilation and Moisture Control
Mold and mildew-the top causes of dark, discolored grout-thrive in damp, stagnant air. Run your bathroom exhaust fan during and for 20–30 minutes after showers, or crack a window if you don’t have one. In kitchens, keep range hoods on while cooking to reduce steam buildup on backsplash grout.
The Power Of Grout Sealing
Sealing is your best defense for long-term clean tile grout. Once your grout is clean and completely dry, apply a penetrating grout sealer-it fills microscopic pores, making it harder for stains, mold, and grime to take hold. Re-seal every 6–12 months in wet areas. This one step transforms how easy it is to maintain your results from any method in this guide to clean dirty tile grout.

Frequently Asked Questions
Can I Use White Vinegar to Clean Tile Grout?
White vinegar is a popular natural cleaner, but it is not recommended for regular grout cleaning due to its acidic nature. Vinegar can etch and weaken grout over time, especially if it is unsealed or made from sensitive materials like natural stone. While it may cut through light soap scum, it is less effective on stubborn stains like mold or deep grime compared to the methods outlined in this guide. However, vinegar can be a key ingredient in creating an all-purpose cleaning spray. Mixing vinegar with water and essential oils results in a great cleaner for various surfaces around the home.
If you choose to use vinegar, always dilute it with equal parts water and test on a small, hidden area first. Avoid using it on colored or dark grout, as it may cause fading. For safer and more effective alternatives, stick to baking soda paste or hydrogen peroxide treatments described earlier.
How Long Does It Take for Grout to Dry Completely After Cleaning?
Grout drying times vary based on humidity, ventilation, and the cleaning method used. Typically, grout can take 24 to 48 hours to dry fully after a deep clean. To speed up the process, ensure good airflow by opening windows or using a fan, and avoid walking on floors or using showers until the grout is completely dry to prevent moisture retention and mold growth.
For best results, check dryness by touching a discreet area; if it feels cool or damp, wait longer. After drying, consider applying a grout sealer to protect against future stains, as mentioned in the maintenance habits section.
Will These Cleaning Methods Work on Colored or Dark Grout?
Yes, most methods in this guide are safe for colored grout, but avoid bleach-based products like chlorine bleach, which can lighten or discolor dark grout. Instead, opt for oxygen bleach or hydrogen peroxide treatments, which are gentler and less likely to alter color. Always test any cleaner on a small, hidden section first to ensure colorfastness.
For heavily stained colored grout, focus on gentle scrubbing with a soft-bristled brush and rinse thoroughly. If discoloration persists, a grout pen or recoloring solution (covered in method 6) may be a better option to restore the original hue without damaging the pigment.
What Should I Do if I Have an Allergic Reaction to Grout Cleaning Products?
If you experience skin irritation, breathing issues, or other allergic symptoms, stop using the product immediately and ventilate the area. Rinse affected skin with water and seek medical advice if symptoms persist. To prevent reactions, always wear gloves, a mask, and eye protection, as recommended in the tools and safety section.
For future cleaning, choose hypoallergenic or natural alternatives like baking soda paste, and ensure products are fragrance-free if you have sensitivities. Reading product labels for allergens and working in well-ventilated spaces can minimize risks.
Can I Use These Methods on Grout in High-humidity Areas Like Pools?
Yes, but extra caution is needed for pool grout due to constant moisture and chemical exposure. Methods like oxygen bleach or steam cleaning are effective for removing algae or mineral deposits, but avoid harsh chemicals that could react with pool water. After cleaning, ensure grout is thoroughly dried and sealed with a waterproof sealer designed for wet environments.
For pool areas, prioritize regular maintenance to prevent buildup, such as rinsing grout after swimming and using a brush designed for submerged surfaces. If stains persist, consult a professional to avoid damaging the tile or grout system.
Final Words
Your grout transformation journey starts with choosing the right method for your specific situation and committing to the process. Whether you opt for the gentle baking soda approach, the powerful oxygen bleach treatment, or professional steam cleaning, each technique we’ve covered has proven effective when applied correctly. Remember that patience and proper preparation make all the difference between mediocre results and that brilliant white grout you’re after.
The key to long-lasting success lies in combining your chosen cleaning method with consistent maintenance habits. Weekly quick cleans and proper ventilation will keep your grout looking fresh between deep cleaning sessions. Don’t forget that sealing your grout after cleaning creates a protective barrier that makes future maintenance much easier.
Ready to tackle that dingy grout and see real results? Pick the method that best fits your grout type and stain severity, gather your supplies, and start with a small test area. For more home improvement tips and cleaning solutions that actually work, check out Savvy Dwelling where we share practical advice for every corner of your home. Your sparkling clean grout is just one weekend project away!

