How to Remove Salt Stains From Leather Boots and Restore Their Original Beauty
Watching those unsightly white streaks creep up your favorite leather boots after just one snowy walk can feel heartbreaking. Winter salt stains don’t just ruin your boots’ appearance—they actually damage the leather by drawing out moisture and causing permanent cracking if left untreated. You’ve invested in quality footwear, and seeing it deteriorate with each winter outing is genuinely frustrating.
This guide provides five proven methods to completely remove salt stains from any type of leather boot, plus the exact steps to prevent future damage. We’ve tested every approach on different leather types and compiled the most effective techniques that restore your boots to their original condition. You’ll have clear, actionable solutions that work whether you’re dealing with fresh stains or stubborn white marks that have been there for weeks.
Contents
- Quick Solutions Table
- 1. The White Vinegar Solution Method
- 2. The Saddle Soap Treatment
- 3. The Plain Water Method for Fresh Stains
- 4. Commercial Leather Cleaner Solutions
- 5. Special Treatment for Suede and Nubuck Boots
- 6. Post-cleaning Conditioning and Protection
- The Science Made Simple: Why This Problem Happens
- 5 Habits to Keep Salt Stains From Coming Back
- Frequently Asked Questions
- Final Words
- Sources:
Quick Solutions Table
When salt stains appear on your leather boots, you need to act fast. Different cleaning methods work better for different situations, and choosing the wrong approach can actually make the stains worse.
We’ve tested every method below extensively during harsh winter months. Here’s your quick reference guide to pick the right solution for your specific situation:
| Method | Best For | Time Required | Effectiveness | Safety Level |
|---|---|---|---|---|
| White Vinegar Solution | Heavy, set-in salt stains on smooth leather | 15-20 minutes | Excellent | High (with proper dilution) |
| Saddle Soap Treatment | Deep cleaning and conditioning combined | 25-30 minutes | Very Good | Very High |
| Plain Water Method | Fresh stains (within 24 hours) | 5-10 minutes | Good for new stains | Highest |
| Commercial Leather Cleaner | Expensive boots, delicate leather | 20-25 minutes | Very Good | High (brand dependent) |
| Suede/Nubuck Specific | Textured leather surfaces only | 30-45 minutes | Excellent for texture preservation | High (requires special tools) |
The key is matching your boot material and stain severity to the right cleaning approach. Fresh salt stains on smooth leather respond beautifully to simple water treatment, while older, crusty buildup requires more aggressive action.
Notice how suede and nubuck boots need completely different care. Using smooth leather techniques on textured surfaces can permanently damage the material’s distinctive feel and appearance.
1. The White Vinegar Solution Method
Why This Method Works
White vinegar creates an acidic solution that naturally dissolves salt crystals without damaging your leather boots. The mild acidity breaks down mineral deposits while being gentle enough for most leather types. This method works particularly well because vinegar neutralizes the alkaline properties of road salt, preventing further damage to the leather fibers.
Unlike harsh chemicals, vinegar won’t strip away natural oils from your leather. It actually helps restore pH balance while effectively removing those stubborn white salt stains that make your boots look worn and neglected. A great way to harness vinegar’s cleaning power is by making an all-purpose cleaning spray with it. This simple solution can tackle various cleaning tasks throughout your home, just like it rejuvenates leather.
What You’ll Need
- White vinegar (distilled works best)
- Warm water
- Clean microfiber cloths (2-3 pieces)
- Soft-bristled brush or old toothbrush
- Small bowl for mixing
- Paper towels
Step-by-step Instructions
Preparing Your Cleaning Solution
- Mix equal parts white vinegar and warm water in your bowl. For most boots, 1/4 cup of each works perfectly.
- Stir the solution gently to combine. The mixture should have a mild vinegar scent but not be overwhelming.
- Test the temperature with your finger – it should feel comfortably warm, not hot.
Application Process
- Remove loose dirt and debris from your leather boots using a dry cloth.
- Dip one microfiber cloth into the vinegar solution, wringing out excess liquid until it’s damp but not dripping.
- Gently dab the salt-stained areas, working from the outside of the stain toward the center.
- For stubborn salt deposits, use the soft-bristled brush dipped in solution to work the mixture into the leather grain.
- Allow the solution to sit for 2-3 minutes to dissolve the salt crystals completely.
- Wipe away the dissolved salt with a clean, damp cloth using circular motions.
Drying and Finishing
- Pat the cleaned areas dry with paper towels, removing all moisture from the surface.
- Stuff your boots with newspaper or boot trees to maintain their shape during drying.
- Place boots in a well-ventilated area away from direct heat sources like radiators or sunny windows.
- Allow 24 hours for complete air drying before wearing or applying any conditioners.
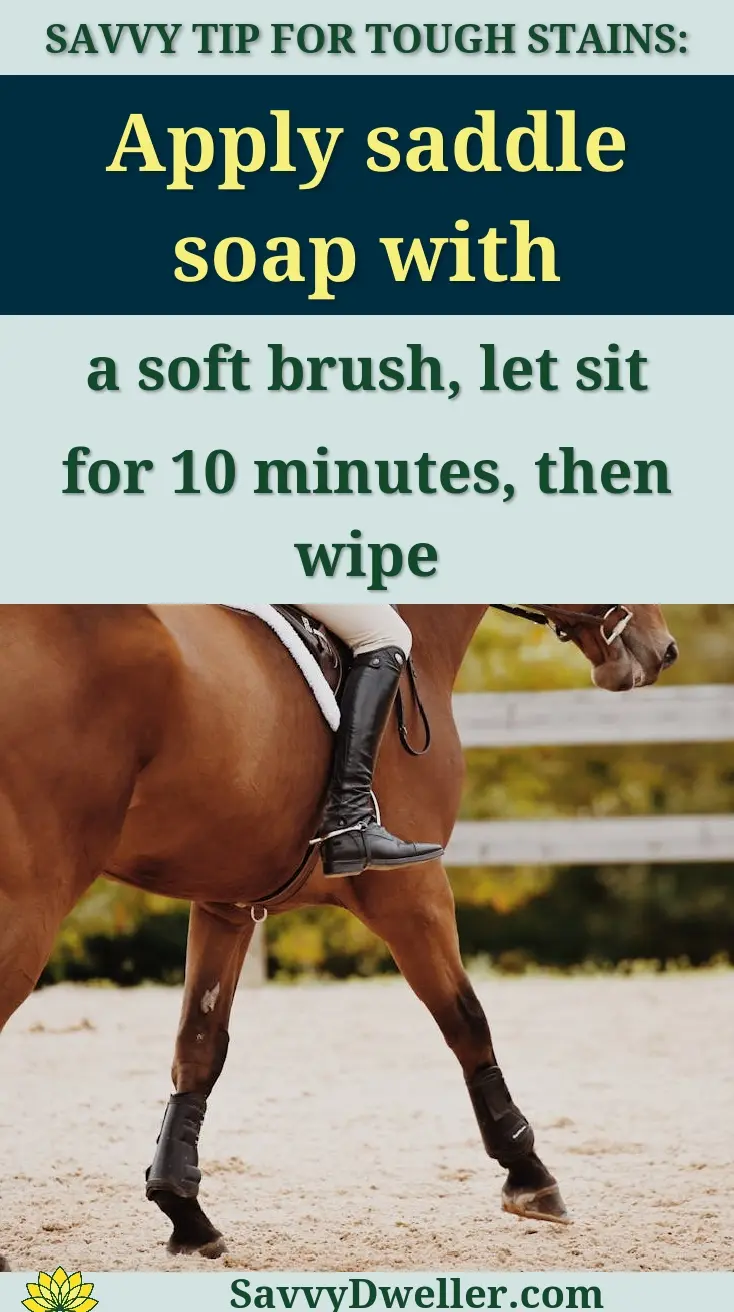
2. The Saddle Soap Treatment
When to Choose Saddle Soap
Saddle soap works best for heavy-duty salt stain removal on thick, sturdy leather boots. This traditional leather cleaner excels when you’re dealing with deeply embedded salt deposits or boots that haven’t been cleaned in weeks. It’s particularly effective on work boots, hiking boots, and other robust leather footwear.
Choose this method when the white vinegar solution isn’t strong enough, or when your boots need both cleaning and conditioning in one step. Saddle soap contains glycerin, which helps restore moisture while removing salt stains from leather boots. For those dealing with mud stains on pants or shoes, knowing the best way to treat these stains can save time and effort. Effective techniques can make all the difference in keeping your clothing looking fresh and clean.
Materials Required
- Quality saddle soap (glycerin-based formula)
- Natural sponge or soft cloth
- Clean water in a bowl
- Soft-bristled brush
- Dry towels
- Leather conditioner (for follow-up treatment)
Application Process
Testing on Hidden Area
- Select an inconspicuous area on your boot, such as the inner ankle or heel.
- Apply a small amount of damp saddle soap to this test spot.
- Wait 5 minutes to check for any color changes or adverse reactions.
- Proceed only if the leather responds well without darkening or stiffening.
Cleaning Technique
- Dampen your sponge with clean water and work it into the saddle soap to create a light lather.
- Apply the soap lather to salt-stained areas using gentle circular motions.
- Work the lather into the leather grain, paying special attention to seams and crevices where salt accumulates.
- Use the soft brush to agitate stubborn deposits, but avoid scrubbing aggressively.
- Rinse the sponge frequently and reapply soap as needed for heavily stained sections.
- Remove soap residue with a clean, damp cloth, wiping until no suds remain.
- Dry thoroughly with towels and allow 12-24 hours for complete air drying.
Also See: The Best Natural Fabric Softener Alternatives That Actually Work
3. The Plain Water Method for Fresh Stains
Best Use Cases
Plain water works remarkably well when you catch salt stains early, typically within hours of exposure. This gentle approach prevents salt crystals from bonding permanently with leather fibers. It’s your first line of defense after walking through slushy, salt-treated sidewalks and streets.
This method shines when dealing with light surface salt deposits that haven’t had time to penetrate deeply. It’s also perfect for delicate or expensive leather boots where you want to try the mildest cleaning approach first.
Quick Action Steps
- Remove your boots as soon as you notice fresh salt residue on the surface.
- Fill a bowl with lukewarm water – not hot, which can damage leather.
- Dip a clean cloth into the water and wring until just damp.
- Gently wipe the salt-affected areas, working in one direction rather than circular motions.
- Rinse the cloth frequently to avoid spreading salt around.
- Pat dry immediately with a clean towel to prevent water spots.
- Allow boots to air dry completely before storing.
Important Timing Considerations
Act within 2-4 hours for maximum effectiveness when removing salt stains from leather boots. Fresh salt dissolves easily in plain water, but once it crystallizes and bonds with leather proteins, you’ll need stronger cleaning methods.
Winter conditions create a narrow window of opportunity. Salt becomes increasingly difficult to remove as it draws moisture from the leather and creates chemical reactions with tanning agents. Quick action with simple water prevents permanent white streaks and extends your boots’ lifespan significantly.
4. Commercial Leather Cleaner Solutions
Choosing the Right Product
When you want to clean salt stains from leather boots quickly and safely, a pH-balanced, water-based leather cleaner is your best bet. These are designed for finished leather and help lift white salt residue without stripping natural oils. Proper care extends beyond boots; it’s equally important to maintain clean leather car seats. By using suitable cleaners and conditioners, you can keep your car’s interior looking fresh and well-maintained.
- Match the cleaner to the material: cream/gel or liquid for smooth leather; foam or specialized formulas for suede/nubuck.
- Check the label for “pH-balanced,” “salt/road grime,” or “safe for finished leather.”
- Avoid bleach, ammonia, and heavy solvents; they can set white lines and dry the leather.
- For light-colored boots, choose “non-darkening” or “color-safe.”
- For heavy winter buildup, select a cleaner that mentions removing salt stains from leather or removing salt stains from shoes.
Always spot test on the inside heel or tongue before you get salt stains off leather boots across the whole surface. That quick check prevents surprises like darkening or tackiness.
Application Guidelines
- Prep the boots: remove laces, insert shoe trees or stuff with paper, and dry-brush off loose salt crystals and grit.
- Pre-dampen a soft cloth with distilled water and wipe the surface to reduce “tide lines.” Do not soak.
- Apply cleaner to the cloth or applicator, not directly to the leather. Work one panel at a time, from seams inward.
- Use small, overlapping circles to lift leather boots salt stains. Refresh your cloth sides as they load with residue.
- Detail the welt and stitching with a soft toothbrush or cotton swab to remove salt from leather boots along edges.
- Wipe away residue with a clean, slightly damp cloth, then blot dry with a towel.
- Air dry at room temperature for 8–12 hours. Keep away from radiators and boot dryers.
- If faint white marks return, repeat the light cleaning once more to finish removing salt stains from leather.
Use the “two-cloth method”-one cloth for cleaner, one for rinsing-to avoid spreading salt lines while cleaning salt stains from leather. Maintaining a clean leather purse or handbag at home requires similar careful techniques. Regular cleaning and proper care can help preserve the beauty and longevity of your leather pieces.
Top-rated Leather Cleaners
| Product | Type | Best For | Why It Helps With Salt |
|---|---|---|---|
| Lexol Leather Cleaner | Liquid, pH-balanced | Finished/smooth leather | Lifts white salt stains on leather boots without harsh solvents; good control with cloth. |
| Bickmore Bick 1 | Liquid cleaner | Finished leather, work boots | Targets road grime and salt residue while keeping the finish clear. |
| Chamberlain’s Leather Milk No. 2 | Gentle cleaner | Casual and dress boots | Useful for removing white stains from leather boots with a mild, controlled clean. |
| Cobbler’s Choice Leather Cleaner | Water-based spray | Daily winter upkeep | Even spray coverage helps prevent tide lines when removing salt stains from shoes. |
| Angelus Easy Cleaner | Multi-material cleaner | Leather, rubber, canvas | Handy for mixed-material boots and cleaning salt stains from leather and midsoles. |
| Saphir Omni’Nettoyant | Foaming cleaner | Suede & nubuck | Designed to remove salt stains from suede boots while preserving the nap. |
Follow each brand’s directions and your boot manufacturer’s care tag when choosing how to clean salt stains off leather boots.

5. Special Treatment for Suede and Nubuck Boots
Key Differences From Smooth Leather
Suede and nubuck have a raised nap that shows salt lines fast and can mat down with moisture. They need gentle, low-moisture cleaning and the right tools to lift the fibers.
Salt stiffens the nap and leaves chalky rings. Your goal is to lift residue dry first, then use minimal foam to finish.
Suede-specific Cleaning Steps
- Tools: suede brush (nylon/brass combo), crepe brush, suede eraser/block, soft microfiber cloths, suede cleaner foam, shoe trees or paper.
- Optional: small soft toothbrush for seams, distilled water for light misting.
- Insert shoe trees and let wet boots reach room temperature. Flex the boot gently to crack any dried salt crusts.
- Brush the entire boot with the nylon side in one direction to lift loose salt and dirt.
- Target white lines with a suede eraser. Rub lightly until the line fades, then re-brush to raise the nap.
- Apply suede cleaner foam to a cloth or suede brush-never soak the surface. Work in short strokes with the grain.
- Blot with a clean cloth to pull out dissolved salt. Rotate to fresh sections as you go.
- Re-brush with a crepe brush to soften the nap. Repeat foam-and-blot if faint marks remain.
This method supports removing salt stains from suede boots without flattening or slicking the surface. Keeping your suede shoes looking fresh is just as important as maintaining a nice jacket. The best way to clean suede jacket shoes involves gentle brushing and avoiding water to preserve their texture.
Brushing Techniques
- Start light and increase pressure only where salt stains on leather boots are stubborn.
- Work heel-to-toe in straight passes; switch directions at the end to evenly raise the nap.
- Use the brass edge sparingly on heavy buildup, then finish with nylon or crepe to smooth.
Drying Methods
- Blot, don’t rub, with a towel after cleaning; then stuff with paper or use cedar trees for shape.
- Air dry at room temp with airflow; no heaters or direct sun. A small fan helps speed drying.
- Once dry, brush again to restore the even, velvety texture.
Nubuck Care Instructions
Nubuck is finer than suede and can show dark water patches if over-wet, so use foam and light, even passes. A nubuck cloth or block is handy for localized salt lines.
- Dry-brush to remove loose salt, then use a nubuck block to fade white rings.
- Apply a dedicated nubuck cleaner or a suede/nubuck foam to a cloth. Work in small panels with gentle, circular motions.
- Blot away residue immediately to prevent tide marks, then let the boot dry fully.
- Brush in multiple directions to raise the fine nap evenly.
For both suede and nubuck, use a nubuck/suede protector spray afterward to reduce new leather boots salt stains.
6. Post-cleaning Conditioning and Protection
Why Conditioning is Essential
Road salt pulls moisture and oils out of leather, leaving it stiff and prone to cracks. Conditioning helps replace those lost lubricants so the fibers flex instead of breaking.
It also evens out the finish after removing salt stains from leather boots, so faint chalky shadows don’t reappear as the boot dries.
Choosing the Right Conditioner
- Smooth leather: choose a light cream or lotion that’s pH-balanced and labeled non-darkening for light colors.
- For harsh winters: a conditioner first, then a wax-based protectant layer to boost water resistance.
- Avoid heavy petroleum greases on modern dress leathers; they can clog pores and attract dirt.
- Mink oil and dubbin can darken-use sparingly and only if darkening is acceptable.
- Suede/nubuck: skip oily conditioners; use water-based protector sprays designed for nap leather.
Match the product to how you wear the boots-daily salt exposure needs more frequent light conditioning, not one heavy coat.
Application Process
Timing Between Cleaning and Conditioning
- Let boots dry fully after cleaning salt stains from leather-usually 8–24 hours depending on room conditions.
- Check that seams and welts are dry; trapped moisture can pull more salt to the surface.
Proper Conditioning Technique
- Use a pea-sized amount of conditioner on a lint-free cloth. Work in thin, even coats.
- Apply with small circles from toe to heel. Stay light on flex creases and the vamp to avoid buildup.
- Let it absorb for 10–15 minutes, then buff lightly with a clean cloth to restore luster.
- For winter rotation boots, finish with a breathable wax or spray protector to reduce future leather boots salt stains.
- For suede/nubuck, skip cream. Instead, mist a dedicated protector spray from 6–8 inches away in two light coats, then brush to lift the nap.
Thin, frequent applications keep leather supple and better prepared for removing salt stains from shoes the next time winter hits.
The Science Made Simple: Why This Problem Happens
Salt stains on leather boots look like chalky white rings because dried road brine leaves mineral crystals behind. Those crystals pull moisture out of leather and disrupt dyes and natural oils, so boots stiffen and discolor.
How Road Salt Damages Leather
Leather is a web of collagen fibers tanned and lubricated with oils-salt brine dehydrates that web. Chloride salts are hygroscopic, so they draw water out of the fibers, then crystallize as sharp deposits that roughen the surface.
The alkaline brine can shift the leather’s pH, loosening tanning agents and pushing pigments, which is why you see white halos and dark tide lines. Repeat wet–dry cycles cause micro‑cracks, curled edges, and brittle seams, and brine can corrode metal eyelets and stain the surrounding leather.
Different Types Of Winter Salt
Not all deicers leave the same mess, and knowing which one you’re walking through explains the stain you see. Some salts leave powdery rings; others feel slightly oily or sticky because they pull in moisture from the air.
| Salt type | Chemistry | Melts to | Residue on leather | Effect |
|---|---|---|---|---|
| Rock salt | Sodium chloride (NaCl) | ~20°F (-6°C) | Bright white, powdery rings | Dries and stiffens; most common white lines |
| Calcium chloride | CaCl2 | ~-20°F (-29°C) | White to gray, slightly slick film | Highly hygroscopic; persistent dampness and dye lift |
| Magnesium chloride | MgCl2 | ~5°F (-15°C) | Hazy, tacky film | Stays moist; can darken spots and attract grime |
| CMA | Calcium magnesium acetate | ~20°F (-6°C) | Faint, less chalky mark | Milder on leather but still dries fibers |
Sand isn’t a deicer but gets mixed in, so grit can scratch finishes while you’re cleaning salt stains from leather. Suede and nubuck show salt faster because the open nap wicks brine deep into the surface.
Why Quick Action Matters
The longer brine sits, the deeper it wicks, locks in white residue, and hardens the leather. As water evaporates, crystals concentrate at the edge of the wet area, setting that sharp “tide line.”
Fast blotting and a quick wipe with clean water keep you from needing heavy fixes later, whether you plan to clean salt stains off leather boots tonight or handle removing salt stains from leather shoes this weekend. Quick action also protects stitching, welt edges, and dyes from repeated swelling and shrinkage.
5 Habits to Keep Salt Stains From Coming Back
Preventive Waterproofing
Sealing the surface keeps brine from soaking in, so you spend less time figuring out how to clean salt stains off leather boots. Treat before the first storm and refresh through the season.
- Neutral pH leather cleaner (or plain water for a light prep)
- Waterproofing: wax paste for smooth leather, spray protector for suede/nubuck
- Lint‑free cloths and a soft brush
- Brush off dust and dry grit so you don’t trap particles under the finish.
- Lightly wipe with a damp cloth and let dry to ensure the waterproofing bonds.
- For smooth leather: massage a thin wax layer over the toe, vamp, and welt; buff lightly. Focus on seams-they’re salt magnets.
- For suede/nubuck: hold a protector spray 6–8 inches away and mist evenly; avoid soaking. Brush the nap when dry.
- Let products cure per label (often overnight) before wearing in slush.
Aim for a breathable barrier-too much silicone can make leather look plastic and trap moisture.
Daily Boot Care Routine
A 2‑minute doorway routine stops white rings before they set and cuts down on deeper cleaning salt stains from leather. Keep a small kit by the door so you actually use it.
- Soft brush or microfiber cloth
- Damp cloth in a resealable bag or a small spray bottle of clean water
- Cedar shoe trees or paper for stuffing
- Before stepping inside, tap soles together to shed grit and slush.
- Wipe splashes with the damp cloth to dilute brine immediately; this helps get salt stains off leather boots before they form.
- Brush seams, the welt, and lace eyelets-salt hides there and reappears as it dries.
- Insert shoe trees and air‑dry at room temperature, away from heat vents.
- For suede, once dry, use a suede brush to lift the nap where salt flattened it.
Doing this daily makes “how to remove salt stains from shoes” a quick wipe instead of a weekend project.
Choosing the Right Winter Footwear
Some materials shrug off brine better, so choose boots that match your weather and your maintenance tolerance. This reduces how often you need to remove white stains from leather boots at all.
- Pick pebbled or corrected‑grain leather for heavy salt days; save aniline or delicate finishes for dry cold.
- Choose storm‑welted or sealed‑welt boots; they resist wicking at the sole edge where leather boots salt collects.
- Go with lugged rubber soles for grip and reduced splash; add overshoes or galoshes when streets are slushy.
- Avoid wearing suede or nubuck during active salting unless you’re ready for removing salt stains from suede shoes the same day.
- Consider waterproof, lined winter boots for commutes and change into dress leather at work.
Storage Tips
Dry, shaped, and ventilated boots resist salt creep and dye migration. Good storage prevents repeat stains at the welt and toe box.
- Cedar shoe trees
- Breathable cotton bags (no plastic)
- Boot tray or grate to keep pairs off wet floors
- After each wear, air‑dry with shoe trees for 24 hours before boxing or bagging.
- Keep boots off damp mats; store on a shelf so brine on the floor can’t wick upward.
- Use breathable bags to block dust while allowing moisture to escape.
- Rotate pairs so each boot fully dries between wears, reducing recurring leather boots salt stains.
Regular Maintenance Schedule
A simple cadence keeps leather conditioned and less likely to show salt lines. Think light, frequent care instead of heavy, occasional fixes.
- After any heavy salt day: quick water wipe and dry routine so you don’t need to figure out how to remove salt stains from boots later.
- Weekly in winter: brush, wipe, and check seams and welts; top up protector if water no longer beads.
- Monthly: clean lightly, then condition smooth leather sparingly; for suede, refresh protector and brush the nap.
- Pre‑season and mid‑season: full clean, re‑waterproof, and inspect soles and stitching where salt accumulates.
- End of season: deep clean and condition, then store dry with shoe trees to avoid off‑season salt bloom.
Following this plan means you rarely face heavy lifting like removing salt stains from leather or figuring out how to clean salt stains from leather when they’ve set hard. Consistent care is the easiest way to clean white salt stains from leather boots less often.
Frequently Asked Questions
Can I Use Lemon Juice As an Alternative to Vinegar for Removing Salt Stains?
While lemon juice is acidic like vinegar, it’s not recommended for leather care. The citric acid in lemon juice can be too harsh and may lighten or damage the leather’s dye. Stick to diluted white vinegar, which is milder and specifically effective at neutralizing salt without risking discoloration. Always test any new cleaner on a hidden area first to ensure compatibility.
What Are the Biggest Mistakes to Avoid When Cleaning Salt Stains From Leather?
Avoid using excessive water or soaking the boots, as this can push salt deeper into the leather and cause water stains or warping. Never use harsh chemicals like bleach, ammonia, or general household cleaners, which can strip natural oils. Also, don’t skip the conditioning step after cleaning, as leather loses moisture during the process and needs replenishment to prevent cracking. Ensure you condition the leather properly to maintain its suppleness.
How Can I Tell if Salt Stains Have Already Caused Permanent Damage to My Boots?
Look for signs like white, chalky residue that doesn’t wipe away, stiff or cracked leather, or fading color. If the stain feels crusty and the leather has lost its suppleness, the salt may have dehydrated and degraded the material. Early action is key; once damage sets in, professional restoration might be needed, but regular conditioning can help revive mildly affected boots.
Is It Safe to Clean Salt Stains From Boots With Intricate Stitching or Metal Hardware?
Yes, but with caution. Use a soft-bristled brush or cloth to gently work around stitching and avoid abrasive scrubbing that could loosen threads. For metal hardware, wipe it dry immediately after cleaning to prevent corrosion, and consider applying a protective wax or sealant specifically designed for metals to maintain their finish.
Final Words
Winter salt stains don’t have to be the end of your favorite leather boots. With the right techniques and a little patience, you can restore them to their former glory and keep them looking great all season long. The key lies in acting quickly when stains appear and following through with proper conditioning to maintain leather’s natural flexibility and protection.
Remember that prevention paired with prompt treatment creates the best outcomes for your winter footwear. Whether you choose the vinegar solution for stubborn stains, saddle soap for deep cleaning, or commercial cleaners for convenience, consistency in your boot care routine makes all the difference. Don’t forget that different leather types require tailored approaches, so always test your chosen method first.
Ready to give your boots the care they deserve? Start with whichever method matches your current situation and available supplies. For more practical home solutions and maintenance tips that actually work, check out Savvy Dwelling where we share research-backed advice for keeping your home and belongings in top condition year-round.
Sources:
- Salt Stains on Leather Shoes: Prevention and Removal Guide — The Shoe Care Shop
- 3 Steps to Survive Winter’s Salt Stains
- How does one get rid of salt damage on leather boots? – Quora
- How to Remove Salt Stains on Leather – LeatherCareUSA
- r/Boots on Reddit: How do i prevent my leather boots from getting damaged by salt during winter?

